How to Build Your Ideal Traditional Sauna: Complete DIY Guide for Home Sauna Construction
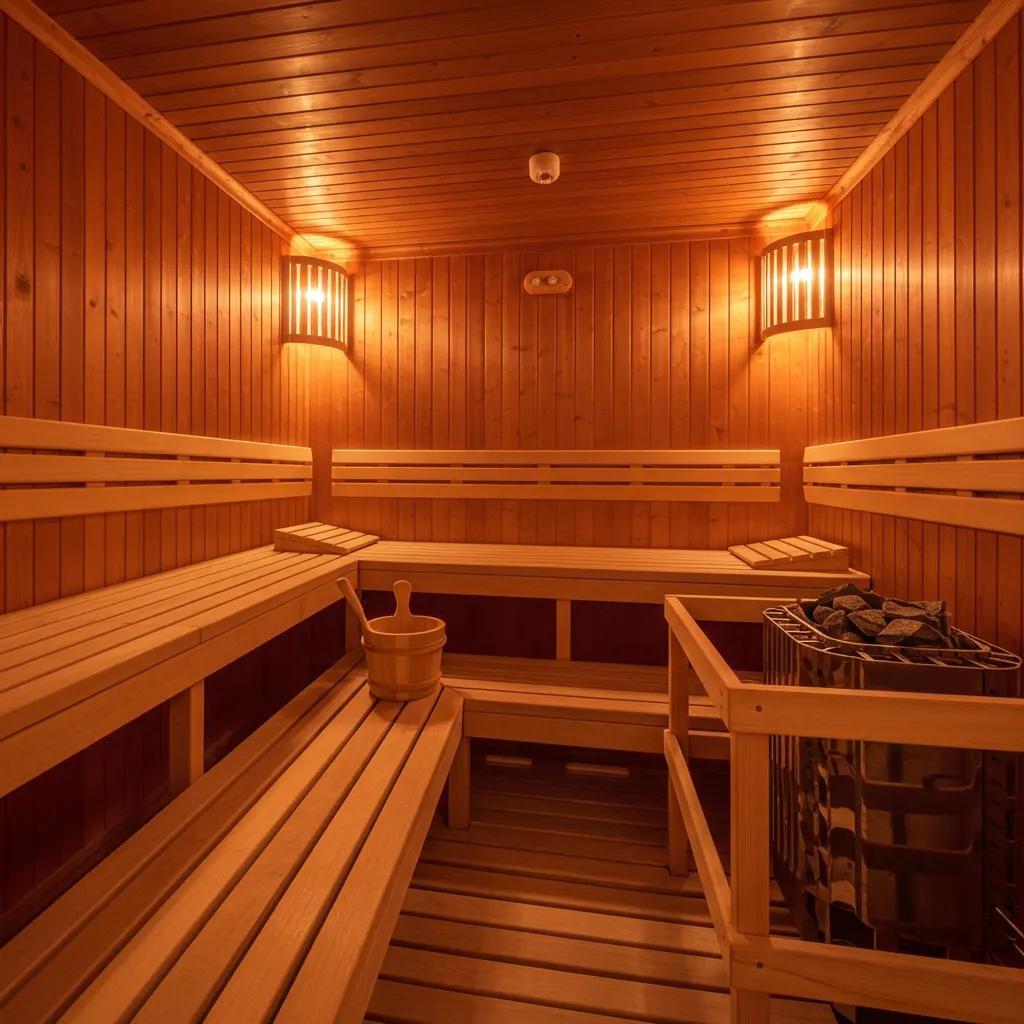
A traditional sauna is a wood-lined, insulated room designed for dry or steam-infused heat. It’s simple in theory—but building one correctly takes planning, attention to detail, and the right materials.
This guide walks you through the process step by step—from sizing and layout to vapor sealing, heater selection, and ventilation—so you can build a sauna that’s not only relaxing, but safe and built to last.
Inside, you'll find:
-
Practical planning steps for indoor or outdoor installs
-
Recommended materials, insulation, and vapor barriers
-
A clear construction sequence to avoid common mistakes
-
Heater sizing, wiring basics, and safety clearances
-
Bench, door, and ventilation design
-
Cost breakdowns for DIY, kit, and turnkey options
Most build failures come down to overlooked details: undersized heaters, poor airflow, moisture damage, or code issues. This article is designed to help you avoid those problems from the start.
All recommendations in this guide come from years of hands-on experience helping homeowners design and build their own saunas. I’ve included what I’ve learned from working with hundreds of customers—what works, what to watch out for, and how to get the best results from day one.
What Are the Essential Planning and Design Steps for Your Traditional Sauna?
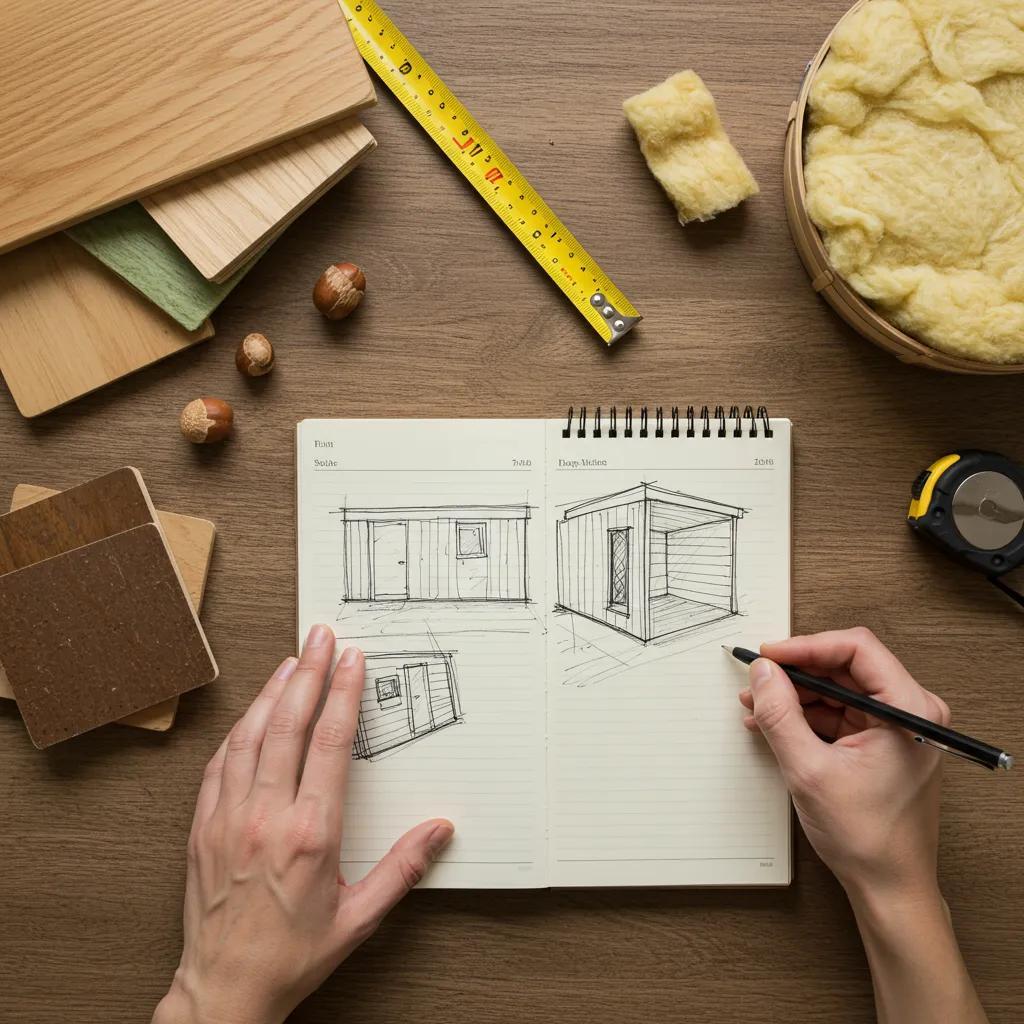
Planning and design begins by defining the sauna’s purpose, capacity, and location. This will help you match size, foundation, and systems to use cases and local code requirements.
Early decisions—indoor vs outdoor, single- or multi-tier benches, and electric versus wood heater—drive framing, clearances, and electrical needs. Knowing these answers will reduce costly changes later in the build.
This section outlines the core checklist and sizing guidance you need to translate a concept into a buildable plan, leading naturally into selecting a specific location and foundation type.
Below is a numbered checklist that summarizes essential planning steps to begin the project:
-
Define occupancy and typical session use to determine sauna cubic footage and heater size.
-
Select indoor or outdoor placement based on factors such as moisture control, accessibility, and aesthetics.
-
Verify local permit requirements for electrical, structural, or plumbing changes with the relevant authorities.
-
Select foundation type appropriate for location: concrete slab, treated deck, or gravel pad.
-
Plan for a dedicated electrical circuit and route for the heater with space for ventilation.
This practical checklist gives you the baseline decisions that inform framing dimensions and system requirements.
Next, we examine location and size specifics so you can turn these high-level choices into exact measurements for framing and bench layouts.
How Do You Choose the Best Location and Size for Your Home Sauna?
Choosing the location and size starts with occupancy and bench layout.
Allow roughly 20–30 cubic feet (0.6–0.85 m³) per person as a planning heuristic and design benches that provide 18–24 inches of seat depth and at least 36 inches of knee/legroom in front.
Indoor installations work well anywhere existing utilities reduce installation cost. Examples include:
-
basements
-
spare rooms
-
garages
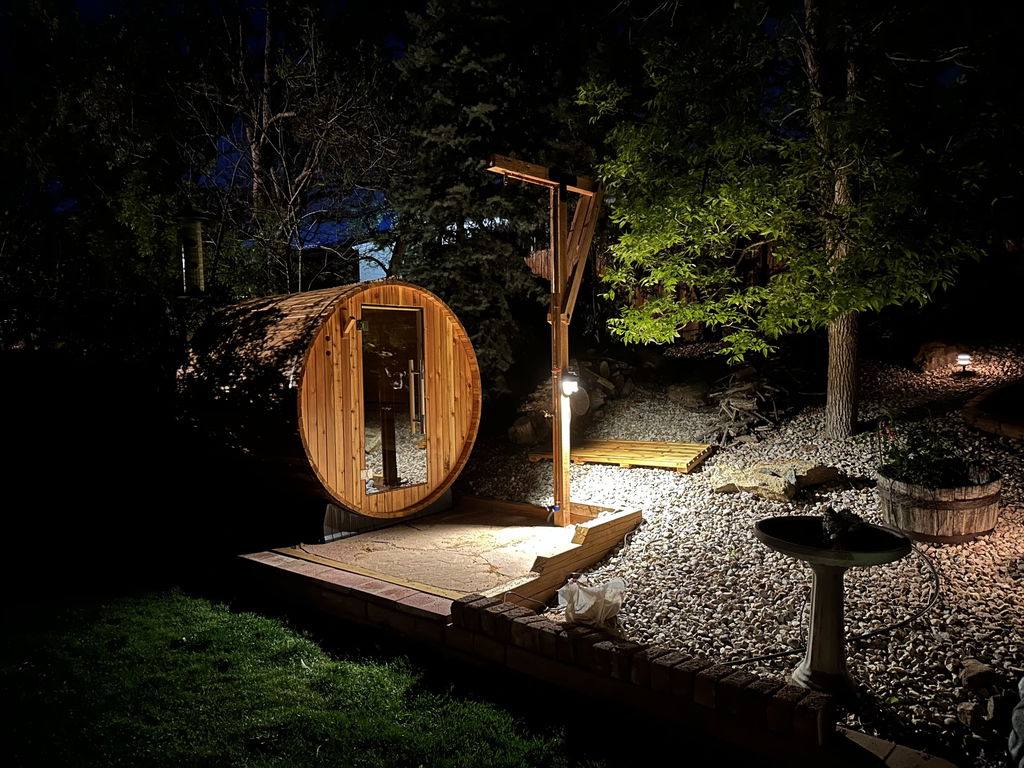
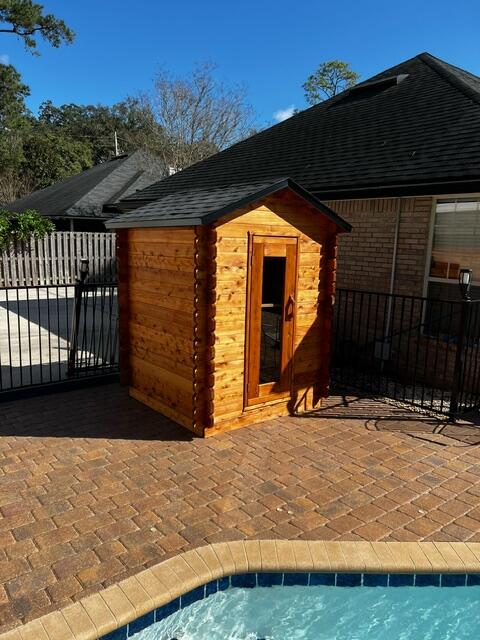
Outdoor or backyard cabins require weatherproofing and site prep. Each location option influences foundation type and ventilation strategies.
Ceiling height should generally be 7–8 feet to balance heat stratification and safety. Very high ceilings dilute heat and raise heater sizing.
These sizing choices affect heater kilowatt requirements and bench tiering, so next we’ll outline permits and foundation options to match the chosen location.
What Permits and Foundation Types Are Needed for Building a Sauna?
Permits depend on local code and the project scope. Electrical upgrades (like dedicated 240V circuits), structural modifications, or new detached buildings commonly trigger permit review, so check with your local building department before ordering materials.
Common foundation solutions include:
-
Poured concrete slab – best for permanent indoor/outdoor saunas
-
Treated wood deck – ideal for elevated surfaces
-
Compacted gravel pad – suitable for lightweight outdoor cabins
Each option has trade-offs in drainage, frost protection, and cost. Regardless of type, foundations must provide level, stable support and accommodate vapor barrier transitions at the floor to prevent moisture migration into the building structure.
After site and foundation choices are locked, the next step is choosing materials—especially wood, insulation, and vapor barriers—that are durable in repeated heat and humidity cycles.
Which Materials Are Best for Building a Traditional Sauna?
Material selection is key to creating a safe, comfortable, and long-lasting sauna. It starts with choosing the right wood species for walls and benches, insulation that can handle high heat and humidity, and a properly installed foil vapor barrier to protect the framing from moisture.
-
The wood you choose affects not only appearance and aroma but also splintering, stability, and long-term performance.
-
Insulation impacts heat-up time and overall energy efficiency.
-
A quality vapor barrier ensures moisture doesn’t penetrate into the wall cavities, preserving the integrity of your structure.
The matrix below compares popular sauna woods to help you choose the best paneling and bench materials based on performance and budget.
Wood Type
Western Red Cedar
Nordic Spruce
Aspen (or Poplar)
Key Attribute
High moisture resistance, pleasant aroma, low thermal conductivity
Economical, light color, moderate stability
Low resin, minimal aroma, low splinter risk
Typical Use
Wall paneling & benches
Wall paneling & interior cladding
Benches & trim
What Are the Benefits of Cedar, Spruce, and Aspen Woods for Sauna Construction?
Each wood species brings unique advantages to sauna design, and the table above highlights key trade-offs to help guide your choice:
-
Cedar resists moisture and decay while emitting a distinctive aroma and remaining dimensionally stable in high temperatures. It’s a top choice for both paneling and benches despite the higher cost.
-
Spruce offers a lighter aesthetic and is more budget-friendly for large wall surfaces, though it may require careful finishing to prevent discoloration and movement.
-
Aspen (and similar hardwoods like poplar) contain little resin, reduce splinter risk, and feel more comfortable for bench seating where skin contact is frequent.
Selecting the right wood strikes a balance between scent preference, budget, and application (walls vs. benches).
With wood choices set, insulation and vapor barrier details become the next priority to ensure long-term moisture protection and energy efficiency.
How Do You Select Proper Insulation and Vapor Barriers for Sauna Walls?
For sauna construction, mineral wool (like Rockwool) is the preferred insulation. Unlike traditional fiberglass, it retains its thermal performance under high heat and resists moisture absorption—key for fast heat-up times and maintaining consistent temperatures.
A foil-faced vapor barrier should be installed on the warm side of the insulation. To ensure a proper seal:
-
Overlaps must be tightly sealed
-
All seams should be taped
-
Detail around penetrations such as fasteners and electrical boxes
Follow the manufacturer's recommendations regarding air gaps—some foil barriers perform best with a small air space between the foil and the interior wall paneling. And always respect the heater’s clearance zones; never install insulation or vapor barrier materials within these areas.
With insulation and vapor control in place, you're ready to proceed to the step-by-step construction phases—including framing, electrical work, and interior finishes—all done in the correct sequence to ensure a safe, high-performing sauna.
What Are the Step-by-Step Construction Phases for a Traditional Sauna Build?
A reliable build sequence reduces errors.
-
Frame the room to accommodate clearances and bench supports
-
Run electrical rough-in for the heater
-
Insulate
-
Install the vapor barrier
-
Complete interior paneling and benches.
Following that order ensures wiring is accessible, dampers and vents are placed correctly, and the heater installation follows manufacturer clearance rules. It also makes inspections smoother when permits are required.
Getting the build sequence right saves time, prevents costly mistakes, and ensures your sauna performs optimally.
The following overview offers clear guidance on framing and insulation, so you can confidently complete the structural phase and move on to vapor sealing and interior paneling without setbacks.
Use this checklist to follow the typical construction sequence for a small-to-medium sauna build:
-
Framing: set studs, ceiling height, and bench supports to exact dimensions.
-
Electrical rough-in: run conduit/cables for heater, lights, and controls prior to insulation.
-
Insulation: place heat-tolerant insulation between studs, following manufacturer guidance.
-
Vapor barrier and paneling: seal the barrier and install tongue-and-groove cladding and benches.
Following this sequence helps everything fit together smoothly, avoiding issues between systems and ensuring ventilation and heater clearances are spot on.
Next, we’ll walk you through the framing and insulation details to help you build a solid, reliable sauna space.
How Do You Frame and Insulate the Sauna Structure Correctly?
Start with standard stud spacing, using 2x4 or 2x6 lumber depending on your structural needs and any built-in storage. For areas where benches will be installed, add extra blocking and sturdy supports to handle the added weight.
A few key tips for clean, functional framing:
-
Keep electrical conduit out of bench support areas to avoid interference.
-
Plan bench mounting carefully so fasteners don’t puncture the vapor barrier.
-
Use horizontal cleats attached to blocking—not just studs—for secure bench installation.
When insulating, fit mineral wool (like Rockwool) snugly between the studs without compressing it. Be sure to maintain clearances around the heater and any flue chases, as specified by the manufacturer.
Once framing and insulation are done, you're ready to move on to sealing the vapor barrier and installing your interior cladding.
How Is the Vapor Barrier Installed and Interior Paneling Completed?
To create a moisture-safe and durable sauna interior, follow these key steps:
Step 1: Install the Vapor Barrier
-
Use a foil-faced vapor barrier on the warm side of the insulation.
-
Overlap seams by at least 6 inches, and seal them with high-temperature foil tape.
-
Wrap and seal the barrier around floor transitions, corners, and all penetrations (such as wiring or fasteners) to maintain a continuous and effective vapor layer.
Step 2: Install Interior Paneling
-
Use tongue-and-groove, sauna-grade wood paneling.
-
Fasten it with stainless steel or corrosion-resistant nails or screws.
-
Leave a small gap around the ceiling perimeter to allow for seasonal wood movement and prevent splitting at the seams.
Step 3: Seal Around Fixtures
-
Countersink fastener heads slightly to reduce stress on the wood.
-
Any electrical boxes should be sealed using high-temperature gaskets to maintain the integrity of the vapor barrier.
Step 4: Finish Interior Elements
-
Once the paneling is complete, proceed to bench framing and trim work, using fasteners that match your chosen wood species.
-
This sets the stage for your final mechanical installs, including the sauna heater.
How Do You Install and Choose the Right Sauna Heater?
Choosing the right sauna heater comes down to a few key factors: the size of your sauna, the type of experience you want (steady electric heat vs. traditional wood-fired steam), and your preferences for installation and maintenance. Getting the right size heater and following the manufacturer's clearance requirements is critical for both safety and performance.
Stone capacity and placement also matter. High-quality sauna stones store heat and release it as soft or intense steam depending on how they’re stacked and splashed. Always use stones recommended for your specific heater model.
What Are the Differences Between Electric and Wood-Burning Sauna Heaters?
Here's a quick comparison of the main types:
Electric heaters are often the go-to for residential saunas. They offer precise temperature control, modern timers, and easier installation—typically requiring a dedicated 240V circuit installed by a licensed electrician.
Wood-burning stoves, on the other hand, deliver a more traditional experience with rich aroma and powerful steam (löyly). They require more space and planning, including a chimney or flue, a non-combustible base, and larger clearance zones.
Hybrid or specialty models combine elements of both but may need custom installation and setup.
Sauna Heater Comparison Table
Heater Type
Electric Sauna Heater
Wood-Burning Sauna Stove
Hybrid / Specialty Models
Typical kW / Size
4–9 kW for small to medium rooms
Size matched to volume (BTU-based)
Varies by model
Installation Needs
Dedicated 240V circuit; follow manufacturer wiring
Chimney/flue, masonry pad, larger clearances
Manufacturer-specific electrical/plumbing
Pros / Cons
Easy control, minimal venting, faster installation
Authentic heat and steam, higher install complexity
Flexible experience, may require custom install
Key Takeaways for Choosing Your Heater
Now that you've seen the options side by side, here’s how to decide:
-
If you want ease of use, precise controls, and lower installation effort, go with an electric heater.
-
If you prefer authentic steam, self-reliance, and a more immersive sensory experience, a wood-burning stove may be the better fit.
-
Don’t forget to factor in long-term maintenance: electric units may need occasional servicing or stone changes, while wood stoves require fuel handling and chimney upkeep.
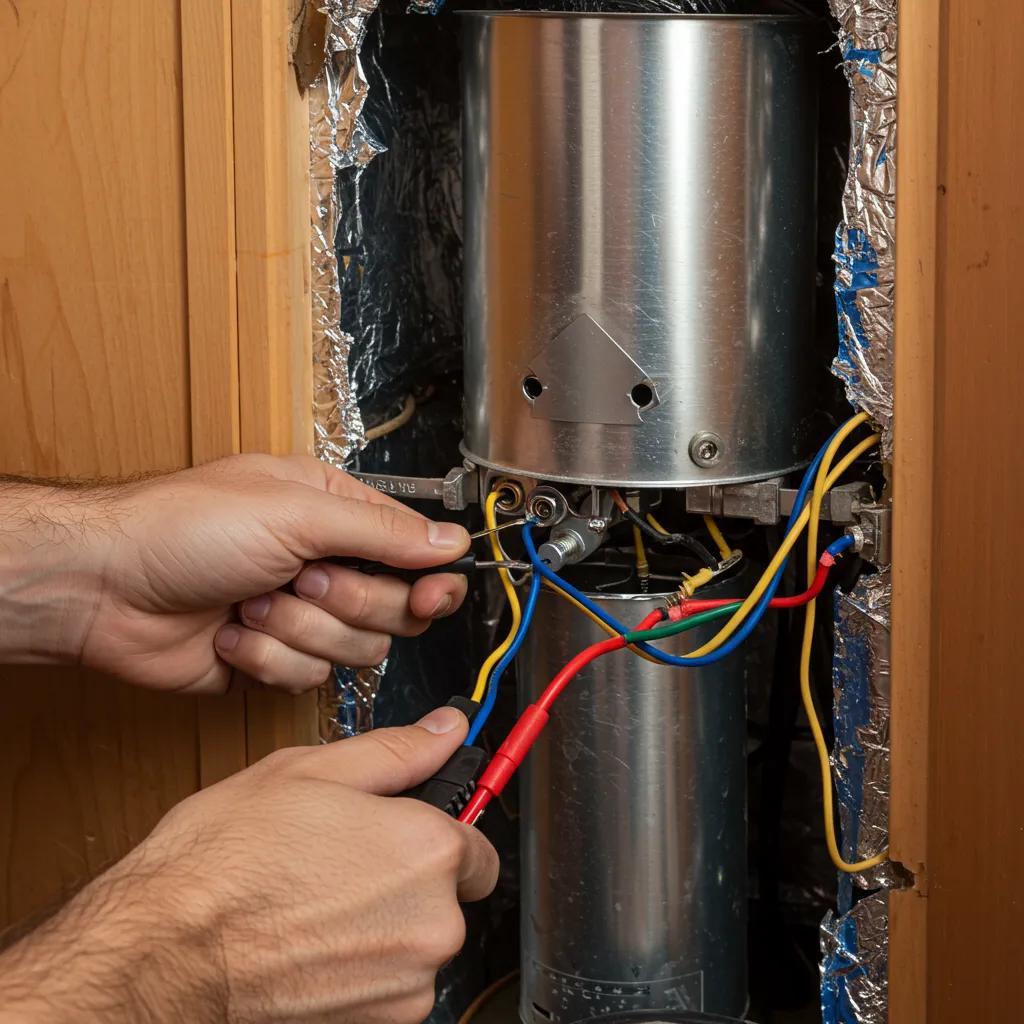
How Do You Properly Wire and Install a Sauna Heater for Safety?
Installing a sauna heater safely—whether electric or wood-burning—requires attention to code compliance, manufacturer specs, and smart layout choices.
For Electric Heaters:
-
Use a dedicated 240V circuit sized to match the heater’s kilowatt rating.
-
Breakers and wire gauges must be properly rated and installed per local electrical code.
-
Always follow the manufacturer’s wiring diagram, and use GFCI protection if required in your area.
-
Label the circuit clearly and keep controls easily accessible.
-
Whenever possible, keep junctions and wiring outside the heated envelope to reduce wear from heat cycling.
For Wood-Burning Stoves:
-
Install the stove on a non-combustible base and maintain required clearances from walls and ceilings.
-
Use a code-compliant chimney or flue, and install heat shields if needed for safety.
-
Many jurisdictions require a local inspection before first use, so be sure to check with your building department.
When in doubt, hire a licensed electrician or HVAC professional to verify all clearances, connections, and compliance with code and insurance requirements. A safe setup ensures peace of mind and long-term enjoyment.
What Are the Best Practices for Sauna Interior Finishing and Ventilation?
A well-finished sauna isn’t just about looks—it’s about comfort, safety, and efficient airflow. Good interior design includes smart bench layouts, proper door and lighting choices, and a ventilation system that refreshes the air without disrupting heat balance.
Key Ventilation Guidelines:
-
Install a fresh-air inlet low on the wall near the heater. This supports even heating and combustion (for wood stoves).
-
Place an exhaust vent high on the opposite wall to remove humid air and prevent overheating.
-
This gentle airflow helps maintain safe oxygen levels, consistent temperature, and overall comfort without cold drafts.
Interior Finishing Tips:
-
Use low-voltage or sauna-rated lighting fixtures with protective covers to handle heat and humidity.
-
Choose doors that swing outward for safety. If using glass, opt for tempered or heat-tolerant glazing.
-
Install benches with comfort and structural support in mind, using appropriate wood and fasteners.
-
Complete the space with functional accessories like thermometers, hygrometers, ladles, buckets, and headrests—they enhance the sauna ritual and keep everything practical.
These finishing and ventilation practices create a safe, enjoyable atmosphere and set the stage for your final touches like bench construction and accessory placement.
How Do You Build Sauna Benches and Install Doors and Vents?
Your sauna’s benches, doors, and vents are more than functional—they shape the comfort, safety, and airflow of the entire experience.
Bench Construction:
-
Use sturdy framing with blocking and cleats to support seated and reclining weight safely.
-
Standard bench heights are:
-
17–20 inches for lower benches
-
Around 36 inches for upper benches
-
Seat depth typically ranges from 18–24 inches per tier.
-
Space bench slats to allow drainage and airflow, and round all edges for comfort.
-
Choose heat-resistant, low-splinter woods like aspen or cedar, especially for surfaces that will have skin contact.
Doors & Vents:
-
Sauna doors should always swing outward and offer clear egress—safety first.
-
For proper ventilation:
-
Place a fresh air supply vent low, near the heater.
-
Install an exhaust vent high on the opposite wall to promote upward airflow and humidity control.
Once your benches and vents are in place, complete the interior with essential accessories, such as thermometers, hygrometers, ladles, and buckets, to enhance both function and ritual.
Which Accessories Enhance the Traditional Sauna Experience?
The right accessories don’t just add charm—they improve safety, comfort, and the overall ritual of sauna bathing.
-
Thermometers and hygrometers help you monitor temperature and humidity to stay within safe, effective ranges.
-
Wooden buckets and ladles let you control steam bursts (löyly) by pouring water over the sauna stones.
-
High-quality sauna stones, matched to your heater’s specifications, ensure the steam is clean, soft, and safe.
For added comfort:
-
Headrests and backrests support your posture and help reduce heat stress.
-
Timers and low-voltage LED lighting enhance ambiance without increasing the electrical load in the heated space.
For a polished finish, consider matched accessory sets—bundles that include stones, ladles, guards, and more—designed for aesthetic cohesion and compatibility with your chosen heater.
With your accessories selected, you’re ready to explore the final step: comparing DIY builds, kits, and pre-built saunas to find the best fit for your budget and vision.
How Much Does It Cost to Build a Traditional Sauna and What Are Your Options?
The total cost of building a sauna depends on several factors: size, materials, heater type, foundation, and whether you hire professionals or go the DIY route. Small, DIY-friendly builds can cost significantly less than professionally installed turnkey models—though premium wood and brand-name heaters can raise material costs quickly.
Typical budget categories include:
-
Framing lumber
-
Insulation and vapor barrier
-
Interior paneling and benches
-
Heater and stones
-
Electrical work
-
Finishing hardware and accessories
The table below breaks down common cost categories and provides estimated low-to-high ranges to help you plan realistically and decide whether to build from scratch, use a kit, or purchase a pre-built sauna.
Cost Item
Framing & Structural Materials
Insulation & Vapor Barrier
Interior Wood Paneling & Benches
Heater & Stones
Labor (electrician/carpenter)
Typical Range
$300–$1,500
$150–$600
$500–$3,000
$400–$3,000+
$500–$3,000+
Notes
Depends on size and framing method
Mineral wool and foil barrier vary by area
Species choice (cedar vs spruce) drives cost
Electric vs wood-burning and brand affect price
Depends on local rates and complexity
This table shows how choices like heater type and wood species can substantially affect your budget—and can help you determine whether DIY, a kit, or a turnkey sauna fits your goals.
What Are the Material and Labor Costs for a DIY Sauna Build?
For a modest 4–6 person sauna, material costs typically include:
-
Framing lumber and fasteners
-
Mineral wool insulation and foil vapor barrier
-
Tongue-and-groove paneling and bench boards
-
Mid-range electric heater and stones
-
Sauna door, vents, lighting, and accessories
Depending on quality, the total can range from a few thousand dollars (budget build) to several thousand more for premium woods and top-tier heaters.
Labor costs vary by region and scope. Common expenses include:
-
Licensed electrician for heater wiring
-
Carpentry for benches, paneling, and trim
-
Permit and inspection fees
-
Foundation prep or adjustments
Don’t forget to budget for contingency costs, like framing corrections or unexpected electrical upgrades.
Is It Better to Build Your Own Sauna or Buy a Pre-Made Kit?
Each option has trade-offs. Here’s a quick comparison:
DIY Build
Kit Sauna
Turnkey / Pre-Built
Choose DIY if you’re comfortable with tools and want full control. Kits are ideal for streamlined builds with moderate customization. Turnkey is best if you want speed, support, and minimal effort.
Frequently Asked Questions
What are the health benefits of using a traditional sauna?
Traditional sauna use offers several wellness benefits, including improved circulation, muscle relaxation, and relief from joint pain. The heat opens blood vessels, enhancing blood flow and supporting post-exercise recovery. Sweating also helps cleanse the skin, potentially improving its clarity and tone. Regular use may reduce stress and support cardiovascular health, making it a valuable part of any wellness routine.
How often should I use my sauna for optimal benefits?
Most people benefit from using a sauna 2 to 3 times per week, with sessions lasting 15 to 30 minutes. Beginners should start shorter and build up gradually. Regular use supports relaxation, detoxification, and cardiovascular health. Always stay hydrated and listen to your body—comfort and safety come first.
What safety precautions should I take when using a sauna?
-
Hydrate before and after use
-
Avoid alcohol or heavy meals before entering
-
Limit time inside, especially if you're new
-
Consult your doctor if you have heart or respiratory conditions
-
Ensure good ventilation to maintain air quality
Following these precautions helps you enjoy the sauna safely and effectively.
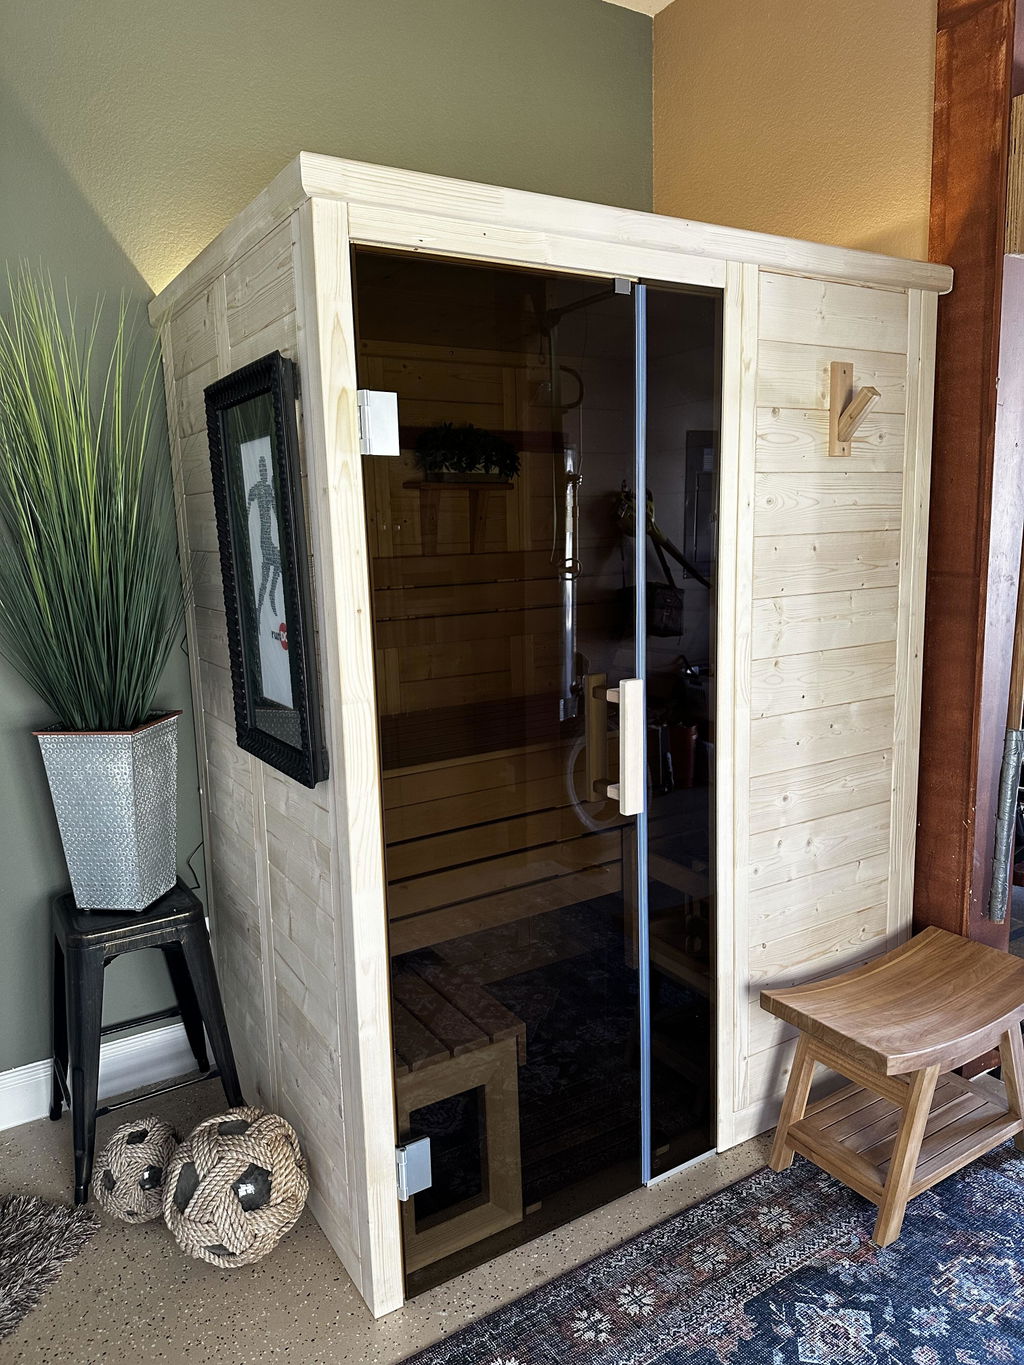
Can I install a sauna in a small space?
Yes! Compact sauna models—like two-person or corner units—are ideal for small rooms or bathrooms. Just be sure to allow for proper ventilation, maintain safe heater clearances, and confirm that your electrical setup can support the heater.
What maintenance is required for a traditional sauna?
-
Wipe down benches and walls after each use to prevent moisture buildup
-
Check heater and stones periodically for wear
-
Inspect vapor barrier and insulation for damage
-
Ensure proper airflow to prevent mold or excessive humidity
With regular upkeep, your sauna will stay clean, efficient, and safe for years to come.
What accessories should I consider for my sauna?
Some key accessories to enhance your experience include:
-
Thermometer and hygrometer – to monitor conditions
-
Wooden bucket and ladle – for creating steam
-
Headrests and backrests – for added comfort
-
Low-voltage lighting – for ambiance and safety
Matched accessory sets can also create a cohesive, stylish look and ensure compatibility with your setup.
Conclusion
Building your own traditional sauna is more than a project—it’s an investment in your health, relaxation, and daily well-being. With the right planning, quality materials, and clear guidance, you can create a personalized space that enhances both your home and your lifestyle.
This guide has equipped you with the essentials to get started confidently—from foundation to finishing touches. Whether you go the DIY route, choose a kit, or opt for a turnkey option, you're on your way to a space that supports your wellness goals for years to come.
Explore our curated sauna kits, heaters, and accessories to take the next step toward building your perfect retreat.
SIGN UP. SAVE BIG.
Subscribe to be the first to know about our special monthly sauna sales, sent right to your inbox.


Let customers speak for us
Good communication, easy delivery, easy set up, easy operation, great value. Recommended!

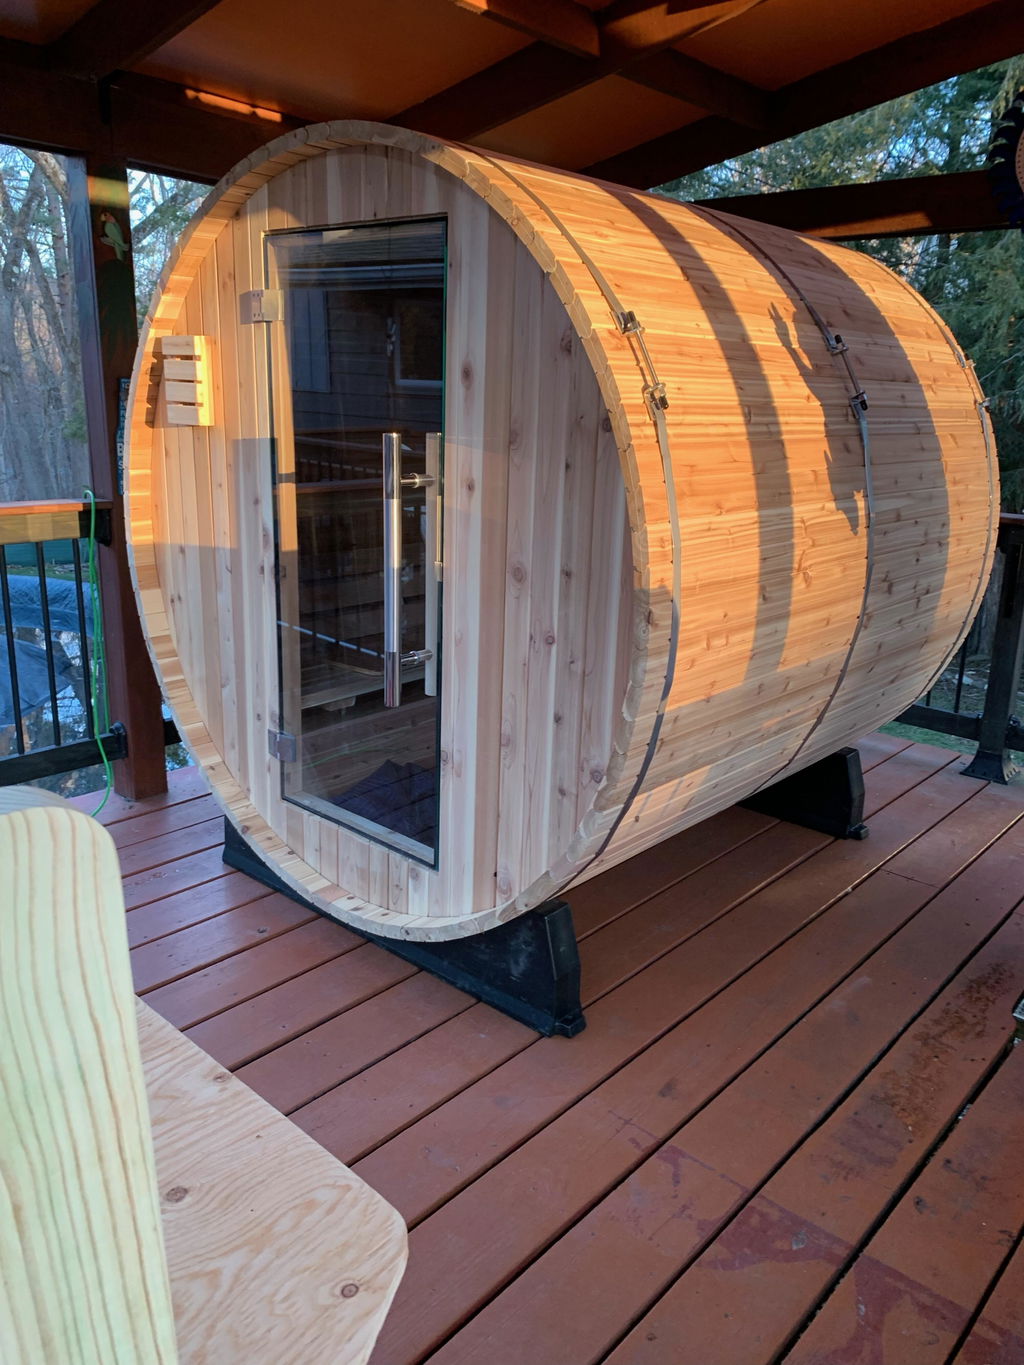
We ordered the 4 person barrel sauna and love it! We wanted a little extra space for the 2 of us/guests and it’s great. We could definitely fit 4 people in it if we needed. We use it every single day. It took about 10 weeks to get here because they build it specifically for the order. Putting the barrel together was fairly easy with 2 people. The electrical and the heater definitely required an electrician to install as we could have not done it alone.
We ordered the biggest heater (harvia spirit 8kw) and it heats up the sauna in about 15 mins inside our 40-50° garage. Overall this style of sauna is hotter and you sweat a lot faster than in an infrared sauna. I truly 10/10 recommend!
Pic is of us in the middle of building it.
Took me about 6 hours over 2 evenings to assemble almost all by myself. Had a pro run a new circuit from my panel. Very well made and assembly was straightforward. Heater is well sized and reaches operating temperature in under 30 minutes.
Great sauna very easy to assemble
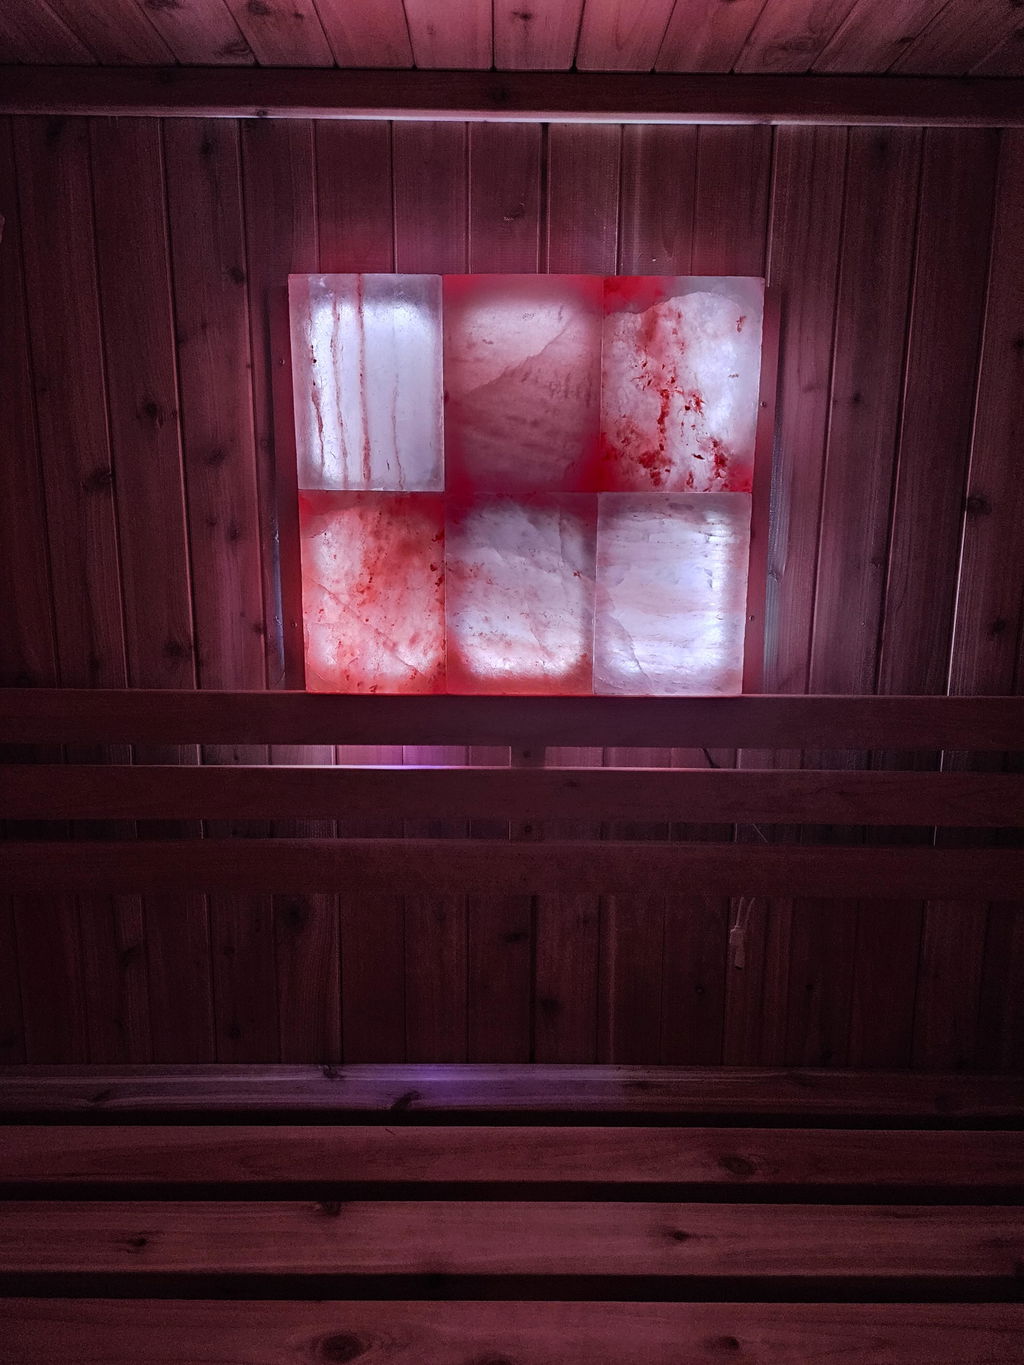
The salt panel was a great addition to our Madison Sauna. It has excellent grain which is accented by the amazing color lights that glow through the panel. Also when you hit the rocks with a splash of water you can feel the heat bounce off the panel. Great addition if you are considering this option.
We can say enough about Sauna World there customer support is great! Our Pinnacle Sauna from Almost Heaven is epic.
The finish and quality is outstanding and it was quick and easy to assemble.
We are thrilled with our mini pod!! It came well shipped and our friend assembled it in 11 hours! Wow! We cannot wait to get healthy and sauna it up!
Beautiful sauna!!! Much easier than I expected to assemble, took a total of 4 hours. Can't wait to get warm by the pool on those cool evenings. Customer service was excellent..
Purchased a 2 person Almost Heaven barrel sauna and were delighted with the product. The order process was quick and easy, the sauna arrived on-time, installation was simple, following the provided instructions, and the sauna is extremely high quality. We’ve used it daily for over 2 weeks and quite frankly I don’t know how we lived without it. If I had it to do over again I wouldn’t change a thing... except maybe purchasing a 4 person model to easier share with friends!
Great Customer Service and a breeze to put together.Excellent shipping and the Sauna is top notch, couldn’t be happier