Custom DIY Sauna Building Guide: Materials & Techniques
Building your own custom sauna is one of the most rewarding ways to create a private wellness space at home. It gives you control over the layout, materials, heater, seating, lighting, and overall experience.
But a sauna is not just a small wood-lined room with a heater.
A well-built sauna needs the right layout, proper insulation, moisture control, safe electrical planning, good ventilation, and skin-friendly materials that can handle high heat over time. Getting those details right is what separates a sauna that simply gets hot from one that feels comfortable, efficient, and built to last.
This guide walks through the essential materials and construction techniques for a custom DIY sauna, including layout planning, wall assembly, wood selection, bench design, ventilation, heater sizing, and finishing details.
Whether you are converting a spare room, building into a basement, finishing a garage corner, or planning an outdoor sauna, the same principle applies:
Plan carefully. Build with the right materials. Keep the sauna simple, safe, and comfortable.
Why Build a Custom DIY Sauna?
A custom DIY sauna gives you flexibility that a prebuilt sauna may not. You can work within an existing room, adapt to unusual dimensions, choose your preferred wood, and design the interior around how you want to use the space.
Common areas for sauna conversions include:
-
Spare rooms
-
Basements
-
Garages
-
Attics
-
Bathrooms
-
Pool houses
-
Sheds or detached outdoor structures
-
Unused corners of larger rooms
A custom build can also make sense when your space has unusual features, such as sloped ceilings, narrow walls, existing windows, or limited square footage.
With the right sauna materials, many experienced DIYers, builders, and carpenters can create a finished sauna that feels intentional, efficient, and deeply restorative.
How to Plan Your Custom DIY Sauna Layout
Smart planning is the foundation of a successful sauna build. Before choosing wood or ordering a heater, start by understanding the room.
Measure the space carefully and sketch the layout to scale. Include fixed features like:
-
Existing walls
-
Doorways
-
Windows
-
Ceiling height
-
Roof slopes
-
Floor drains
-
Electrical access
-
Nearby ventilation
-
Obstacles or structural elements
A clear plan helps you avoid common mistakes, such as choosing a heater that does not fit, placing benches too low, or forgetting to allow for the thickness of wall cladding.
Basic Sauna Layout Guidelines
A comfortable home sauna usually works best when the layout stays close to square rather than long and narrow. A more balanced footprint helps distribute heat evenly and makes bench placement easier.
Use these general layout guidelines as a starting point:
| Sauna Planning Detail | Recommended Guideline |
|---|---|
| Ideal ceiling height | Around 7 ft |
| Acceptable ceiling range | 6.5–8 ft |
| Common family sauna size | 4–6 ft deep by 6 ft wide |
| Sitting bench width | About 20 in |
| Lying bench width | About 24 in |
| Full reclining bench length | About 75 in minimum |
| Common sauna door width | Around 24 in |
| Heater corner allowance | Plan for heater footprint plus guardrail |
| Best door placement | Often on the longer wall |
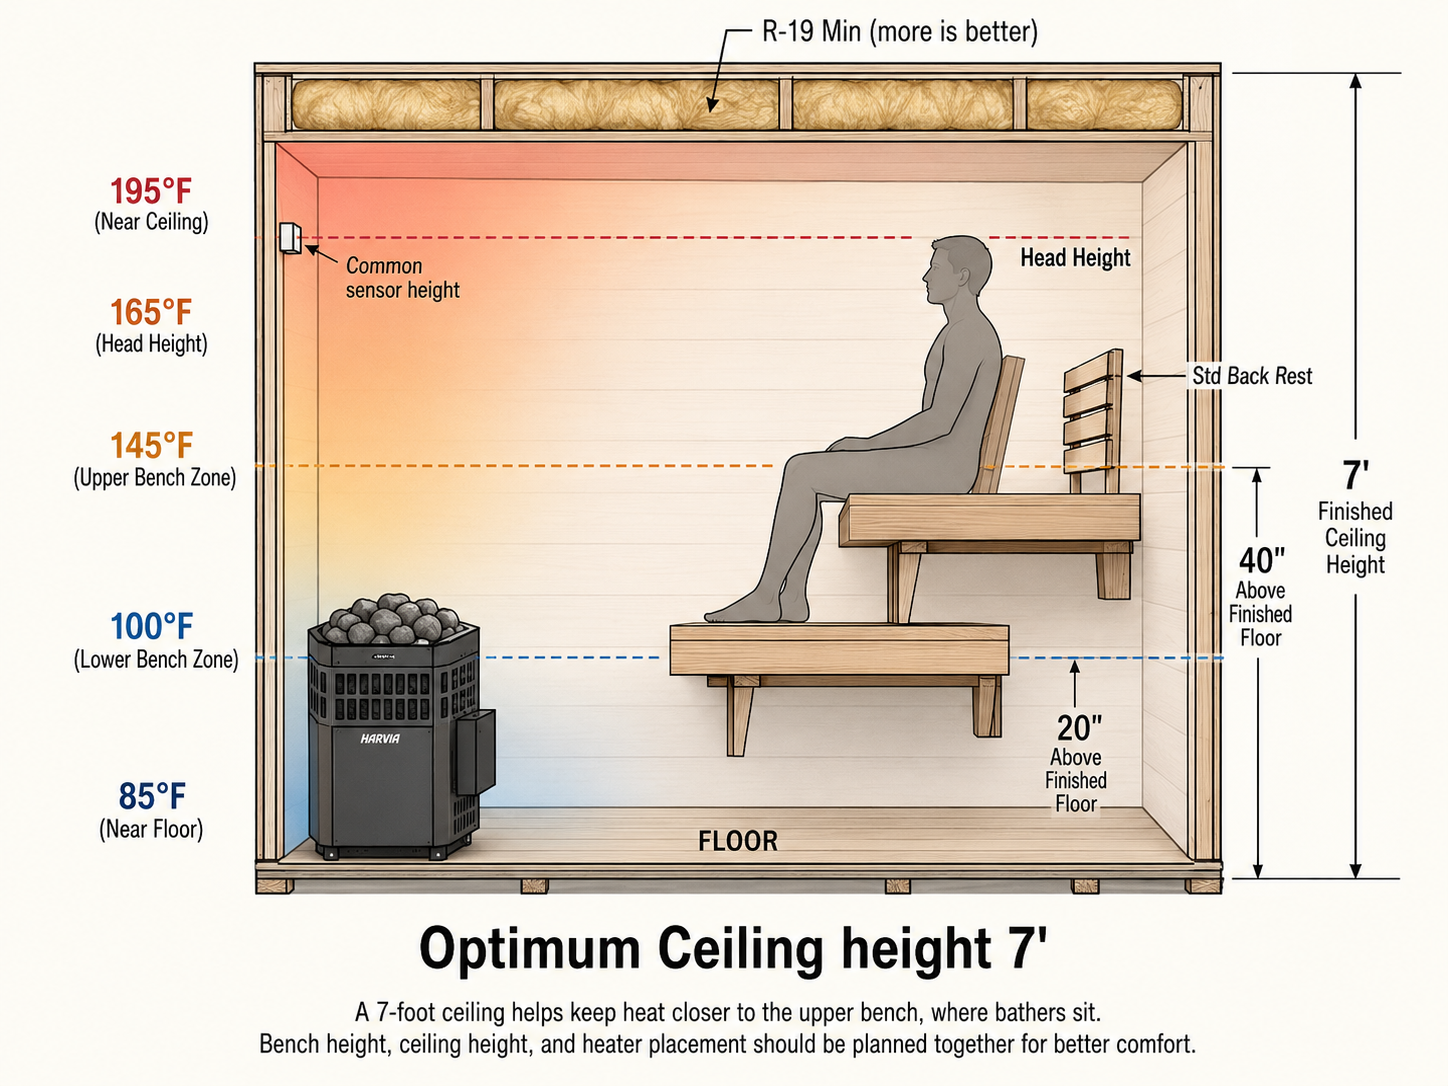
Because heat rises, ceiling height matters. A ceiling around 7 feet helps keep the hottest air closer to the upper bench, where bathers sit. If the ceiling is too tall, heat can collect overhead instead of around the body.
If your existing room has a higher ceiling, it is often possible to frame down the ceiling to a better sauna height.
Sauna Layout Examples
| Layout | Best For | Notes |
|---|---|---|
| 4' x 4' compact sauna | One to two users | Efficient for tight spaces |
| 4' x 6' narrow sauna | Small rooms or basement conversions | Works best with benches along one wall |
| 5' x 6' family sauna | Two to three users | Good balance of comfort and efficiency |
| 6' x 7' larger sauna | Multiple users | Allows more generous bench options |
| 8' x 5' wide sauna | Reclining bench layout | Works well when one long bench is preferred |
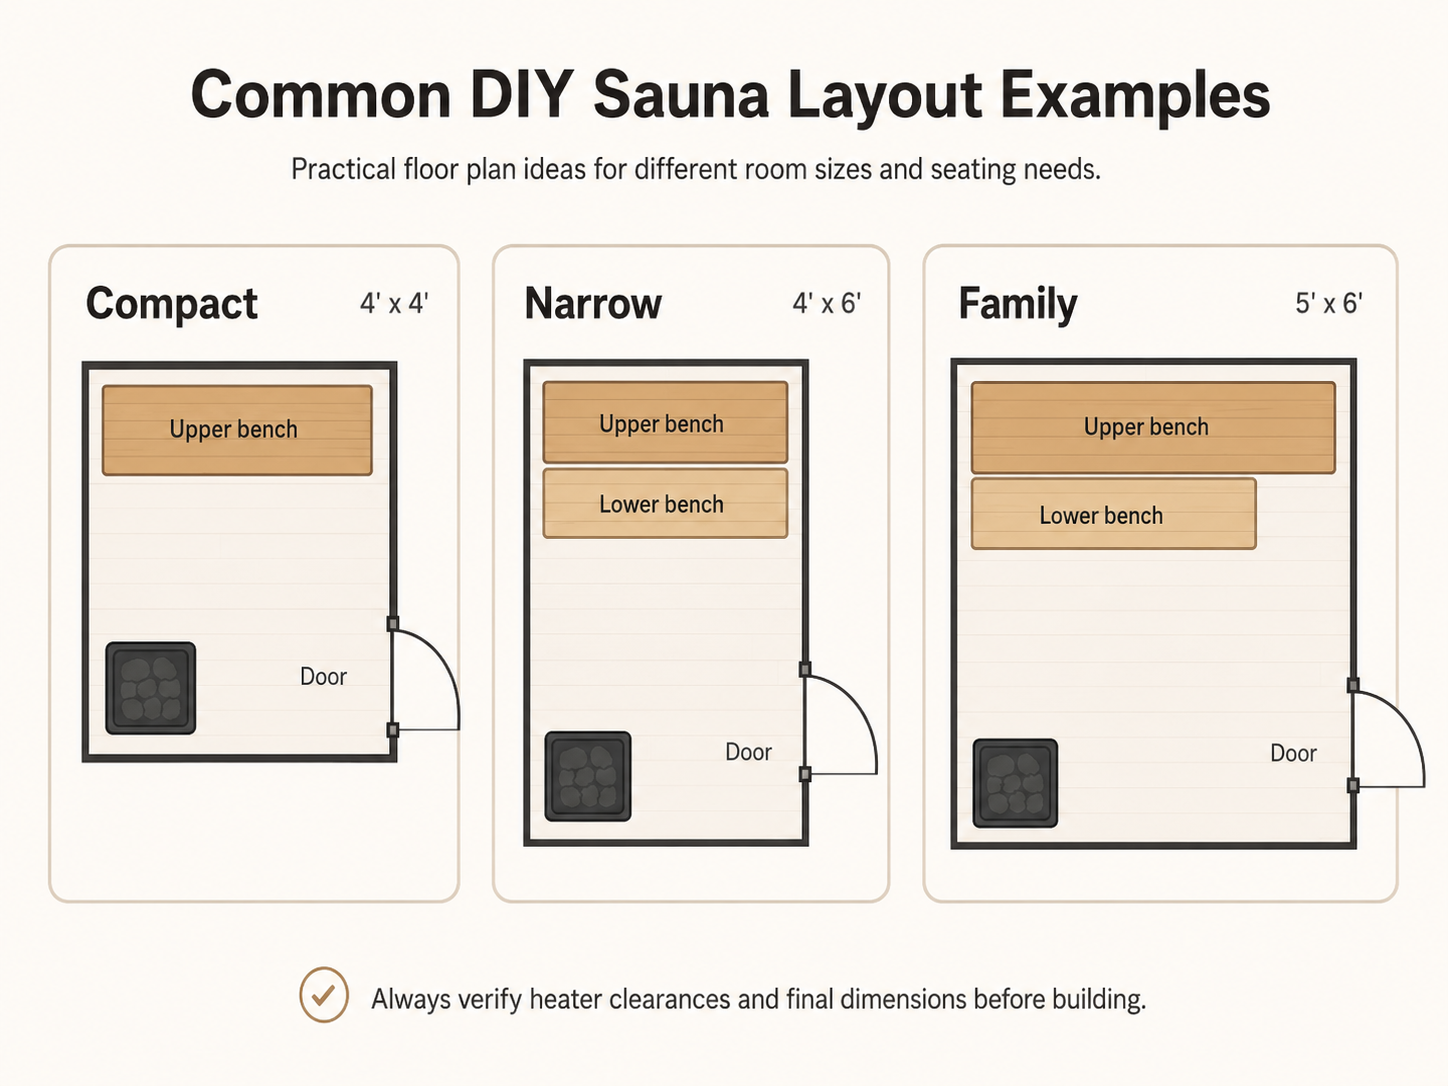
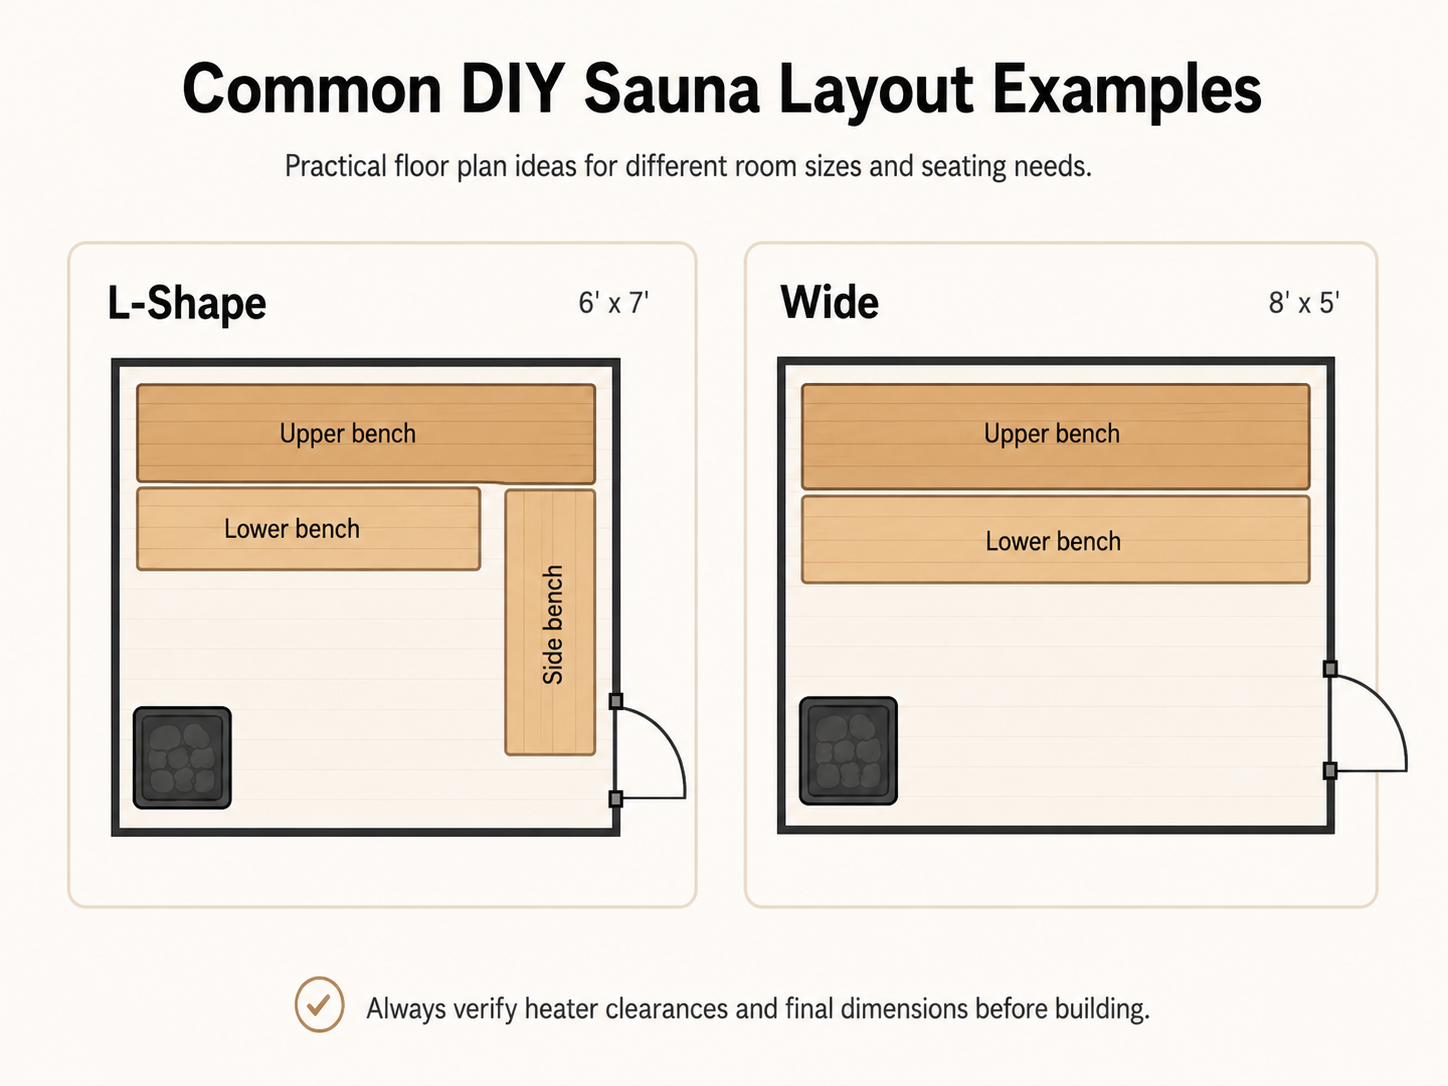
Choosing the Right Sauna Floor Plan
The best sauna floor plan depends on the space available and how you want to use the sauna.
Some people want a compact daily-use sauna for one or two people. Others want a larger sauna with room to stretch out, entertain guests, or create a full hot-cold recovery routine.
Below are the most common layout types.
Corner Sauna Layout
A corner sauna is ideal when you are working with limited space.
It fits neatly into an unused corner of a basement, bathroom, garage, or wellness room. This layout usually works best for one to two users and may include a single bench or compact two-tier bench system.
Best for:
-
Small homes
-
Basement corners
-
Garage conversions
-
One to two users
-
Efficient heating
Planning tip: Keep the heater close to the door or in a front corner so the bench area remains open and comfortable.
Rectangular Sauna Layout
A rectangular sauna is one of the most common and flexible options. It allows benches along one long wall or an L-shaped bench configuration if the room is wide enough.
Best for:
-
Family use
-
Multiple bench levels
-
Reclining benches
-
Longer rooms
-
Traditional sauna layouts
Planning tip: Avoid making the room too long and narrow. If the sauna becomes too tunnel-like, heat distribution and seating comfort can suffer.
L-Shaped Sauna Layout
An L-shaped layout is useful when you want to maximize seating or work around an unusual footprint.
It can create a more social sauna experience because users are not all seated in a straight line.
Best for:
-
Wider saunas
-
Multiple users
-
Odd-shaped spaces
-
Flexible seating
-
Families or entertaining
Planning tip: Make sure the inside corner does not interfere with foot space, heater clearances, or airflow.
Single-Bench Sauna Layout
A single-bench sauna is simple and efficient, especially in narrow rooms. If you only have space for one bench, consider raising the bench higher and adding a footrest or raised platform.
This helps the user sit in the hotter zone of the sauna instead of staying too close to the cooler floor area.
Best for:
-
Narrow spaces
-
One to two users
-
Minimal builds
-
Lower material costs
Planning tip: A single bench should still be high enough to deliver a true sauna experience. Low seating may feel underwhelming because the hottest air remains above the user.
Sauna Ceiling Height and Heat Placement
Ceiling height is one of the most overlooked parts of sauna planning.
In a traditional sauna, the upper part of the room is significantly warmer than the lower part. That is why bench height and ceiling height must work together.
A practical target is:
-
Lower bench: around 20 inches from the floor
-
Upper bench: around 40 inches from the floor
-
Finished ceiling: around 7 feet high
This places the upper bench in a better heat zone while still leaving enough headroom for comfort.
Essential Sauna Construction Materials
A sauna has to withstand heat, moisture, and repeated temperature changes. The right materials are essential for comfort, safety, and durability.
The core materials for a custom DIY sauna include:
-
Framing lumber
-
Insulation
-
Aluminum foil vapor barrier
-
Interior sauna wood paneling
-
Exterior wall finish
-
Sauna door
-
Bench wood
-
Fasteners
-
Heater and controls
-
Ventilation components
-
Lighting and accessories
Each material plays a role in how the sauna performs.
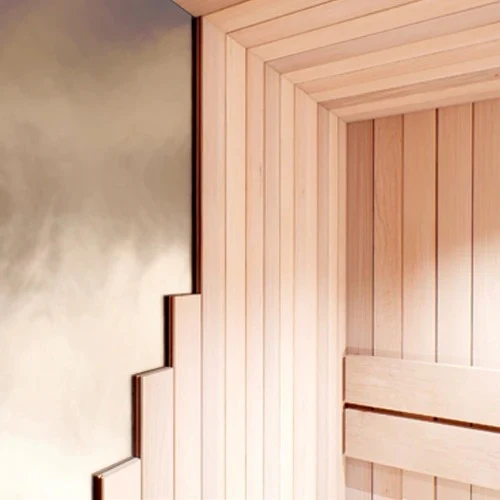
Best Wood Types for Sauna Interiors
Interior wood is one of the most important choices in a sauna build. It affects how the room looks, how it smells, how it feels against skin, and how well the sauna holds up over time.
Sauna wood needs to tolerate high temperatures and changing humidity without excessive warping, cracking, resin release, or splintering.
Avoid ordinary tongue-and-groove paneling from a general lumber aisle unless it is specifically suitable for sauna use. Standard wood may move, shrink, separate, or release resin when exposed to sauna temperatures.
Sauna Wood Comparison Table
| Wood Type | Appearance | Scent | Best For | Key Benefit |
|---|---|---|---|---|
| Cedar | Warm, rich tone | Aromatic | Walls, ceilings, benches, trim | Naturally resistant to moisture and decay |
| Aspen | Light and clean | Very mild | Benches, walls, sensitive users | Low-resin and comfortable against skin |
| Thermo-Aspen | Deeper, refined tone | Mild | Premium interiors and benches | Heat-treated for added stability |
| Alder | Warm reddish tone | Mild | Walls, ceilings, benches | Smooth, attractive, and sauna-friendly |
| Hemlock | Pale to light brown | Neutral | Walls and ceilings | Stable, clean look, often cost-effective |
For surfaces that touch skin, choose smooth, low-resin, knot-free wood whenever possible. Benches, backrests, and armrests should feel comfortable even at high temperatures.
Should Sauna Wood Be Treated?
Interior sauna paneling should generally be left unfinished.
Avoid applying typical stains, paints, varnishes, or preservatives inside the hot room unless the product is specifically rated for sauna use. Many standard coatings can release odors or fumes when heated.
For most sauna interiors, the best finish is simple:
-
Quality sauna-grade wood
-
Smooth sanding where needed
-
No unnecessary surface coating
-
Regular cleaning and drying after use
Framing a DIY Sauna
Most custom saunas use standard 2x4 framing, similar to interior house walls.
Studs are commonly spaced 16 inches on center. This makes insulation easier to install and creates a predictable structure for attaching battens, cladding, benches, and accessories.
Before closing the walls, add blocking or nailers anywhere you will need extra support.
Add blocking for:
-
Upper benches
-
Lower benches
-
Backrests
-
Heater mounting
-
Heater guardrails
-
Lighting
-
Salt panels
-
Speakers
-
Grab rails
-
Towel hooks or accessories
This step is easy during framing and difficult to fix later.
Pressure-Treated Lumber vs. Thermally Modified Sauna Wood
Not all “treated” wood is the same.
For sauna construction, it is important to understand the difference between pressure-treated lumber and thermally modified wood.
Pressure-treated lumber
Pressure-treated lumber is wood that has been chemically treated to resist rot, insects, and moisture. It is commonly used for decks, outdoor framing, fence posts, and areas where wood may contact the ground or concrete.
Inside the heated sauna envelope, pressure-treated lumber should generally be avoided. When exposed to sauna temperatures, chemically treated wood may create unwanted odors and is not ideal for interior sauna use.
A common exception is the bottom plate or footer when framing directly over concrete. In that case, pressure-treated lumber may help prevent rot where the framing contacts the slab.
Thermally modified wood
Thermally modified wood is different. Instead of being chemically treated, it is modified through a controlled heat and steam process. This changes the structure of the wood, helping improve dimensional stability and resistance to moisture-related movement.
That makes thermally modified wood, such as Thermo-Aspen, especially well suited for sauna interiors.
Thermally modified sauna wood is often used for:
-
Interior wall paneling
-
Ceiling cladding
-
Benches
-
Backrests
-
Trim
-
Premium sauna finishes
Because it is designed to handle heat and humidity, thermally modified wood can be a strong choice for a custom DIY sauna, especially when you want a more stable, refined, and long-lasting interior material.
Simple rule of thumb
| Wood Type | How It Is Treated | Best Use in Sauna Builds |
|---|---|---|
| Pressure-treated lumber | Chemical treatment | Bottom plate/footer only when needed against concrete |
| Standard framing lumber | Untreated construction lumber | Wall and ceiling framing outside direct skin contact |
| Thermally modified sauna wood | Heat and steam modification | Interior paneling, benches, backrests, and trim |
For the heated sauna interior, choose sauna-grade wood designed for high temperatures. Save pressure-treated lumber for structural areas where moisture protection is needed and where it will not be exposed directly to sauna heat.
Sauna Insulation: What to Use
Good insulation helps the sauna heat efficiently and hold temperature consistently.
Mineral wool insulation, often sold as Rockwool, is one of the best choices for sauna walls and ceilings because it is:
-
Fire-resistant
-
Water-resistant
-
Odorless
-
Dimensionally stable
-
Good at retaining heat
-
Easier to fit snugly between studs
-
Less irritating than fiberglass for many installers
Fiberglass insulation can work, but mineral wool is often preferred for sauna construction.
Avoid leaving gaps in the insulation. Gaps create cold spots, reduce efficiency, and can increase condensation risk.
Insulation Best Practices
Use this basic checklist:
-
Install insulation snugly between studs and ceiling joists.
-
Do not compress insulation more than necessary.
-
Avoid gaps around corners, blocking, and openings.
-
Support ceiling insulation with string or strapping if needed.
-
Keep the inner face of the insulation flush with the framing.
-
Install the vapor barrier after insulation is in place.
Sauna Vapor Barrier: Why It Matters
A sauna creates heat and moisture. Without a proper vapor barrier, moisture can migrate into the wall cavity, reach insulation or framing, and contribute to mold, rot, or long-term damage.
For sauna interiors, an aluminum foil vapor barrier is commonly used on the warm side of the insulation, directly behind the interior cladding system.
The vapor barrier should cover:
-
Walls
-
Ceiling
-
Corners
-
Around door openings
-
Around window openings
-
Around penetrations for lights, wiring, controls, and vents
Seams should be taped with aluminum foil tape.
Vapor Barrier Installation Tips
| Area | Best Practice |
|---|---|
| Walls | Staple foil barrier to studs after insulation |
| Ceiling | Cover fully and overlap seams |
| Seams | Tape with aluminum foil tape |
| Corners | Overlap carefully and seal |
| Penetrations | Cut tightly and seal around openings |
| Plastic wrap | Avoid inside hot sauna areas when possible |
Plastic housewrap is not ideal inside a sauna because it may produce unpleasant odors when heated. Aluminum foil vapor barrier is the better choice for the hot room assembly.
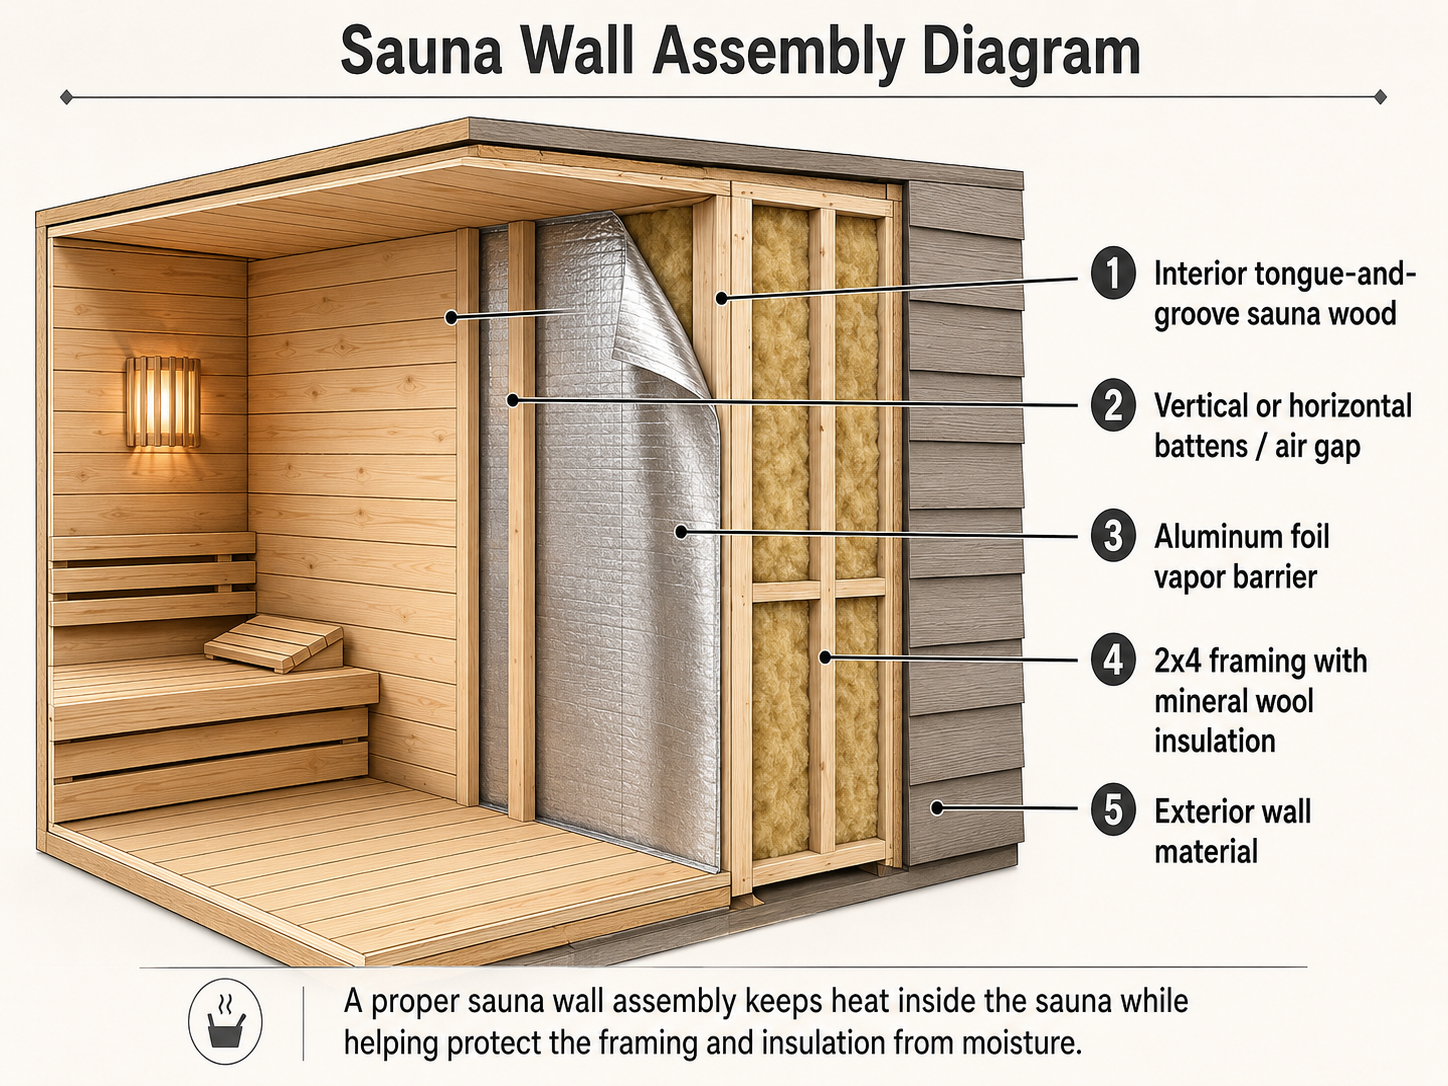
Sauna Wall and Ceiling Assembly
A properly built sauna wall is layered to manage heat, moisture, structure, and appearance.
The typical wall and ceiling assembly includes:
-
Interior sauna wood paneling
-
Air gap or battens
-
Aluminum foil vapor barrier
-
Framing with insulation
-
Exterior wall finish
This system helps protect the wall cavity while allowing the interior cladding to perform properly.
How to Install Sauna Interior Cladding
Interior cladding should be installed carefully so it looks clean and allows for normal wood movement.
A common sequence is:
-
Install insulation between the framing members.
-
Staple aluminum foil vapor barrier over the insulated walls and ceiling.
-
Tape all seams with aluminum foil tape.
-
Install battens or furring strips over the vapor barrier.
-
Install ceiling boards first.
-
Install wall boards after the ceiling is complete.
-
Leave small expansion gaps at corners and transitions.
-
Cover gaps with trim or molding.
For horizontal wall cladding, battens are usually installed vertically over the studs. For vertical wall cladding, battens are usually installed horizontally.
Cladding Installation Tips
-
Start with the ceiling before the walls.
-
Keep boards level and check frequently.
-
Use stainless steel or exterior-grade fasteners.
-
Fasten through the tongue where possible to hide nails or staples.
-
Avoid exposed metal fasteners where skin may touch.
-
Do not use contact adhesives that may release fumes when heated.
-
Use trim to finish inside corners cleanly.
A pneumatic stapler or finish nailer can make installation faster, but choose fasteners carefully. In a sauna, rust and exposed hot metal are both problems.
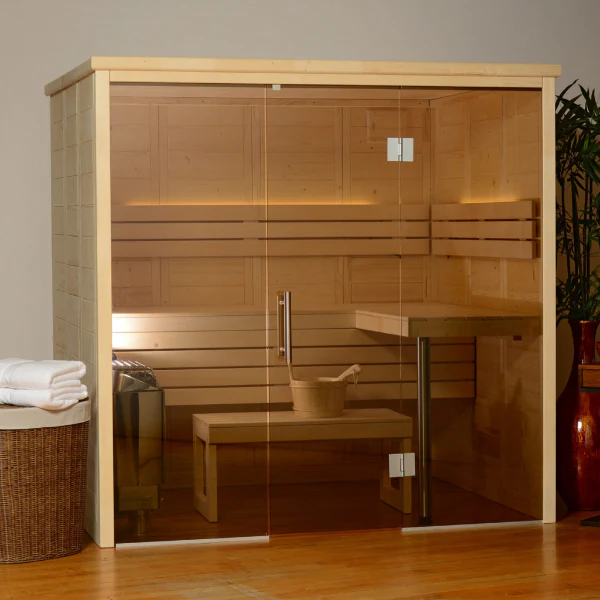
Sauna Doors and Windows
Doors and windows affect heat retention, ventilation, safety, and the overall feel of the room.
A glass door can make a small sauna feel more open, while a wood-framed door can create a more traditional look. Either way, the door should be designed for sauna use.
Sauna Door Best Practices
| Door Detail | Recommendation |
|---|---|
| Door swing | Sauna doors should open outward |
| Glass | Use tempered glass for safety |
| Rough opening | Confirm dimensions before framing |
| Bottom gap | Leave roughly 3/4" to 1" for airflow |
| Installation | Keep frame level, plumb, and square |
| Hinges | Confirm hinge side before ordering |
A gap under the door may sound counterintuitive, but it supports fresh air intake and helps the sauna ventilate properly.
Do not rely on a standard interior residential door unless it is suitable for sauna conditions. Heat and moisture can warp ordinary doors over time.
Sauna Window Planning
Sauna windows can make a sauna feel more open and connected to the outdoors, but they also increase heat loss.
If you include a window, choose double-pane or triple-pane glass when possible. Existing windows in a converted room should be evaluated carefully before building around them.
Keep in mind that glass is considered a cold surface. The more glass you add, the harder the heater has to work.
Other cold surfaces include:
-
Tile
-
Brick
-
Stone
-
Concrete
-
Large glass doors
-
Large windows
These surfaces should be included when calculating heater size.
Sauna Ventilation: Fresh Air, Better Heat, and Faster Drying
Ventilation is essential in a sauna. It supports fresh air, helps distribute heat, and allows the room to dry after use.
A sauna should not be completely sealed. Without airflow, the space can feel stale, heat may distribute poorly, and moisture may linger. Dedicated sauna vents can help with this.
Basic Sauna Ventilation Layout
A good ventilation plan often includes:
-
Fresh air intake near the heater or through the gap under the door
-
Exhaust vent opposite the heater
-
Upper vent with a sliding cover for heat and moisture release
-
Lower vent under the benches to help pull warm air downward
-
Venting into the same room the sauna door opens into, when appropriate
Never vent sauna air into an enclosed wall or ceiling cavity. Moist air trapped inside a cavity can create mold and building damage.

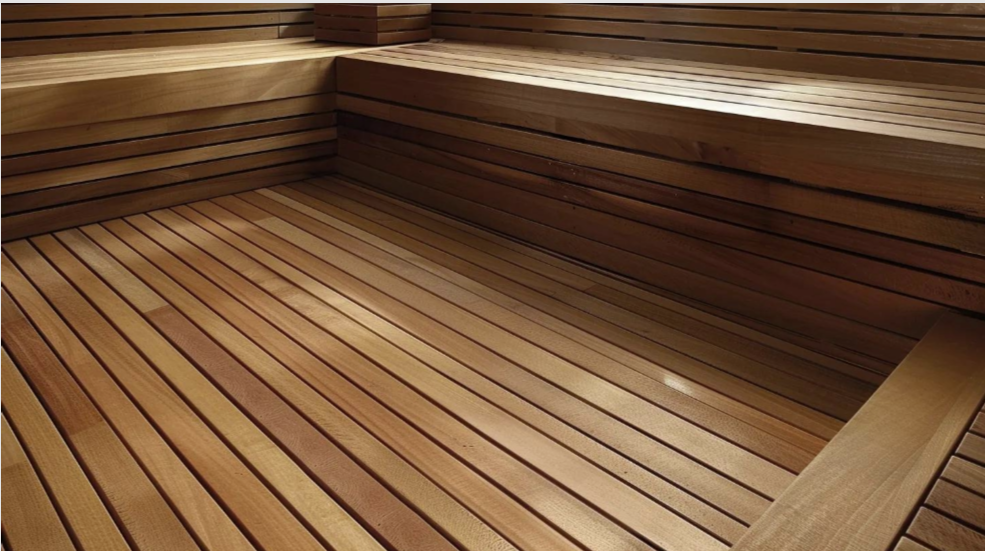
Sauna Bench Design
Sauna benches determine how comfortable your sauna feels.
They also affect how hot the experience feels because seating height determines where the body sits within the heat zone.
A sauna bench should be:
-
Strong
-
Stable
-
Smooth
-
Comfortable against skin
-
Free of sharp edges
-
Built from sauna-safe wood
-
Easy to clean
-
Fastened securely
Sauna Bench Dimensions
| Bench Element | Typical Guideline |
|---|---|
| Lower bench height | Around 20 in |
| Upper bench height | Around 40 in |
| Sitting bench width | Around 20 in |
| Lying bench width | Around 24 in |
| Reclining bench length | Around 75 in minimum |
| Backrest height | Around 9 in |
| Bench frame crossmembers | About every 2 ft |
These are guidelines, not strict rules. Your final bench plan should account for room size, ceiling height, heater clearances, and how many people will use the sauna.
One-Tier vs. Two-Tier Benches
One-Tier Bench
A one-tier bench works well in compact saunas. If using only one bench, it is usually better to raise it higher and include a footrest or raised floor section.
This helps the user sit closer to the heat zone.
Two-Tier Bench
A two-tier bench system is more traditional and gives users temperature options.
The upper bench is hotter. The lower bench can be used as a step, footrest, or cooler seating area.
Bench Wood Selection
Use clear, smooth sauna wood for benches and backrests.
Good options include:
-
Aspen
-
Thermo-aspen
-
Alder
-
Clear cedar
Avoid knotty wood on surfaces that touch skin. Knots can become hotter than the surrounding wood and may feel uncomfortable. Resin pockets can also become painful if they heat and release sap.
Bench Construction Tips
-
Fasten from underneath when possible.
-
Avoid exposed screws or nails on sitting surfaces.
-
Round or soften edges for comfort.
-
Leave small gaps between boards for airflow.
-
Add crossmembers for strength.
-
Avoid supports that trap moisture at the floor.
-
Use rubber or plastic feet if bench supports touch the floor.
-
Make benches removable if easy cleaning is a priority.
Backrests, Skirts, Guardrails, and Duckboards
The details around the benches make the sauna feel more finished and comfortable.
Backrests
Backrests should be made from the same skin-friendly bench wood. A slight recline creates a more natural seating position.
Backrests also prevent users from leaning directly against hot wall boards.
Bench Skirts or Valances
Bench skirts are vertical boards installed between upper and lower benches. They create a more finished look and can help the sauna feel more built-in.
Use sauna bench wood or matching interior wood so the surfaces remain comfortable and consistent.
Heater Guardrails
A heater guardrail helps prevent accidental contact with the hot heater.
This is especially important if children, guests, or multiple people will use the sauna.
Always follow the heater manufacturer’s required safety clearances when designing the guardrail. Do not guess. The clearances are part of safe heater installation.
Duckboards and Sauna Flooring
The sauna floor should be able to handle water.
Suitable base flooring may include:
-
Concrete
-
Tile
-
Properly protected wood floor assemblies
-
Other water-tolerant surfaces approved for the location
Duckboards or removable floor mats can be added over the walking area to provide a warmer, more comfortable surface underfoot.
Duckboards are usually only needed in the standing and walking area, not under the benches.
Sauna Heater Selection and Sizing
The heater is one of the most important decisions in a custom sauna build. A sauna heater that is too small may struggle to reach temperature. A heater that is too large may cycle too aggressively and create uneven performance.
The best heater depends on:
-
Sauna volume
-
Insulation quality
-
Ceiling height
-
Glass area
-
Cold surface area
-
Indoor vs. outdoor location
-
Preferred heat style
-
Electrical availability
-
Local code requirements
How to Calculate Sauna Room Volume
Start with the basic room volume: Room Volume = Length × Width × Height
Example:
| Measurement | Example |
|---|---|
| Length | 6 ft |
| Width | 5 ft |
| Height | 7 ft |
| Room volume | 210 cu. ft. |
A 6' x 5' x 7' sauna has a volume of: 6 × 5 × 7 = 210 cubic feet
Add for Cold Surfaces
Cold surfaces absorb heat and increase heater demand.
Common cold surfaces include:
-
Glass
-
Tile
-
Brick
-
Stone
-
Concrete
A practical adjustment is to add extra cubic feet for cold surface area.
Cold Surface Adder = Total Cold Surface Area × 2
Example:
| Cold Surface | Area |
|---|---|
| Glass door | 15 sq. ft. |
| Window | 6 sq. ft. |
| Total cold surface area | 21 sq. ft. |
| Cold surface adder | 42 cu. ft. |
Then calculate:
Total Heater Sizing Volume = Room Volume + Cold Surface Adder
Using the example above: 210 + 42 = 252 cubic feet
Use that adjusted volume when comparing heater models.
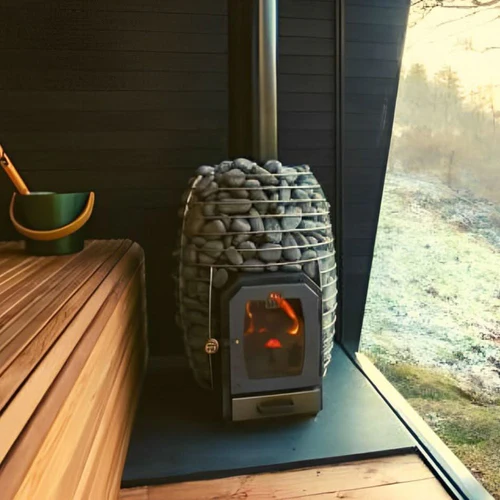
Electric, Wood-Burning, or Infrared?
Different heater types create different sauna experiences.
| Heater Type | Best For | Notes |
|---|---|---|
| Electric sauna heater | Indoor home saunas, convenience, clean installation | Requires proper electrical work |
| Wood-burning heater | Outdoor saunas, traditional experience, off-grid feel | Requires chimney and combustion planning |
| Infrared system | Lower-temperature radiant heat | Different experience than a traditional sauna |
For a traditional sauna, electric and wood-burning heaters are the most common choices.
Sauna Heater Safety Considerations
Heater installation should always follow the manufacturer’s manual and local code.
Important safety details include:
-
Required wall clearances
-
Required bench clearances
-
Guardrail requirements
-
Electrical circuit requirements
-
Control placement
-
Sensor placement
-
Ventilation
-
Floor protection, if required
-
Chimney and combustion air for wood-burning heaters
For electric heaters, use a licensed electrician. Sauna heaters often require dedicated circuits and proper wiring. Incorrect installation can create fire, shock, and warranty issues.
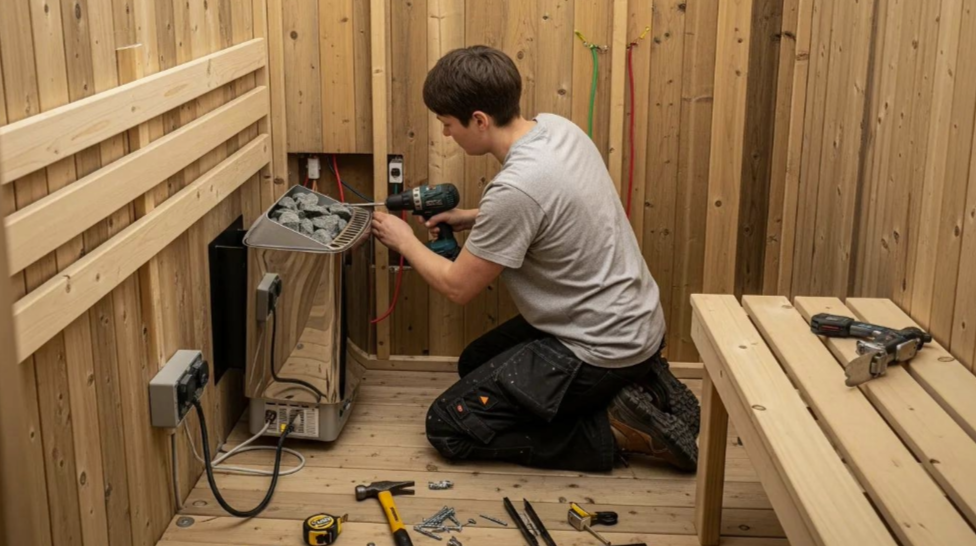
Electrical Planning for a DIY Sauna
Electrical planning should happen before insulation, vapor barrier, and cladding are installed.
Plan wiring for:
-
Heater
-
Heater control panel
-
Temperature sensor
-
Lighting
-
Light switch
-
LED strips or valance lighting
-
Speakers
-
Bluetooth amplifier
-
Salt wall lighting
-
Exterior controls, if applicable
Most electrical components should be sauna-rated or installed outside the hot room where required.
Electrical Safety Notes
-
Do not place standard electronics high on sauna walls.
-
Keep amplifiers and non-sauna-rated controls outside the hot room.
-
Use heat-rated lighting where needed.
-
Follow all manufacturer instructions.
-
Hire a licensed electrician for heater wiring and code-required electrical work.
This is not an area to improvise.
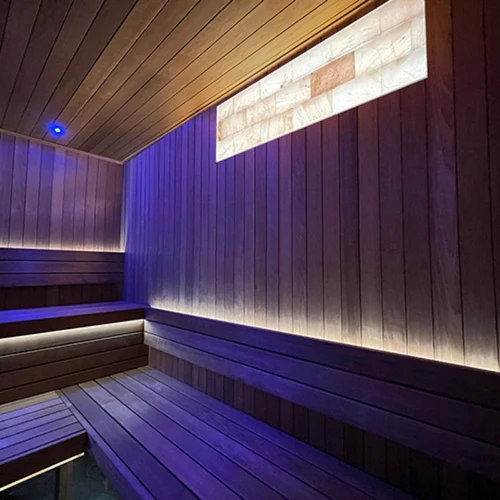
Sauna Lighting Ideas
Sauna lighting should feel calm, warm, and indirect.
Bright overhead lighting can make a sauna feel harsh. Softer lighting placed under benches, behind backrests, or along a wall creates a more premium, relaxing atmosphere.
Good sauna lighting options include:
-
Under-bench LED strips
-
Backrest lighting
-
Wall valance lighting
-
Low-profile sauna-rated fixtures
-
Chromatherapy lighting
-
Backlit salt panels
Lighting Placement Tips
| Lighting Location | Effect |
|---|---|
| Under bench | Soft glow, safer walking visibility |
| Behind backrest | Warm ambient wall wash |
| Wall valance | Clean architectural look |
| Low on wall | Reduces glare |
| Salt panel backlight | Spa-like focal point |
Lighting should be rated for the environment and kept away from locations that exceed the product’s heat limits.
Audio and Wellness Accessories
Sauna accessories should support the experience without cluttering the room.
Popular options include:
-
Sauna-rated speakers
-
Bluetooth amplifier installed outside the sauna
-
Himalayan salt panels
-
Aromatherapy holders
-
Thermometer and hygrometer
-
Sand timer
-
Bucket and ladle
-
Robe hooks outside the sauna
-
Headrests
-
Backrests
-
Floor duckboards
Keep the inside of the sauna simple. The best sauna interiors feel calm, open, and easy to maintain.
Sauna Audio Tips
If adding audio, use speakers designed for heat and moisture. Place speakers lower on the wall when possible, since temperatures are cooler closer to the floor.
A Bluetooth amplifier should usually be installed outside the sauna. Speaker wire can run into the sauna before insulation and cladding are installed.
Himalayan Salt Panels
Himalayan salt panels can add a warm, spa-like focal point to the room. When backlit, they create a soft amber glow that makes the sauna feel more relaxing and visually complete.
For salt features:
-
Use secure mounting methods.
-
Choose low-heat lighting.
-
Keep electrical components properly rated.
-
Follow the manufacturer’s installation instructions.
-
Avoid unsupported health claims unless backed by qualified sources.
Salt panels are best treated as an ambiance and design upgrade.
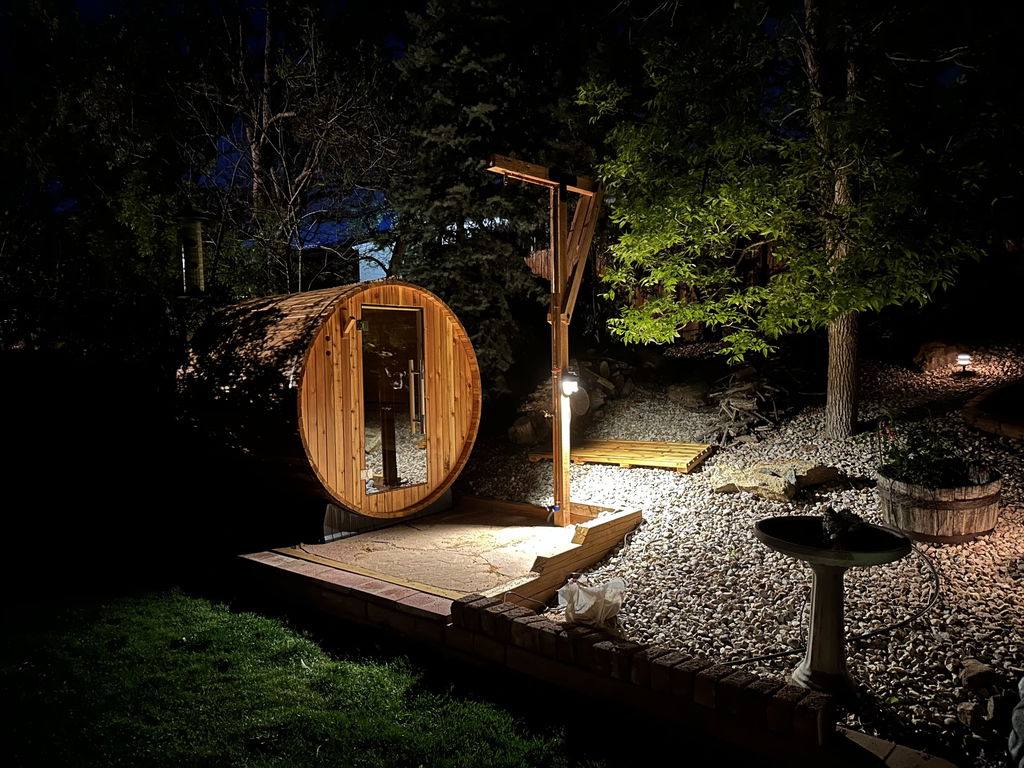
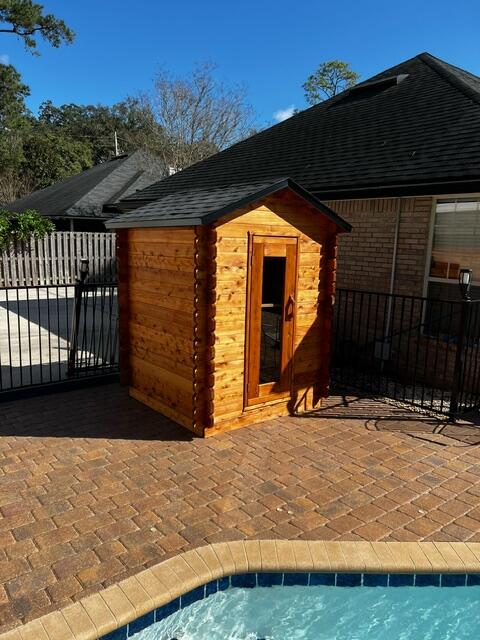
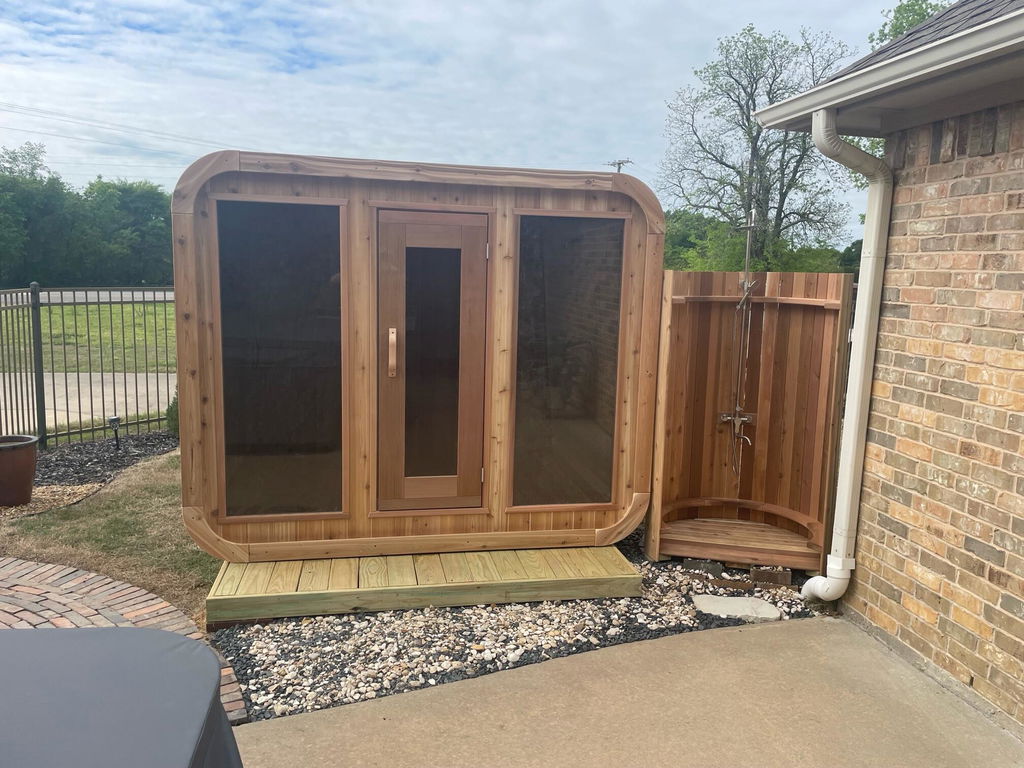
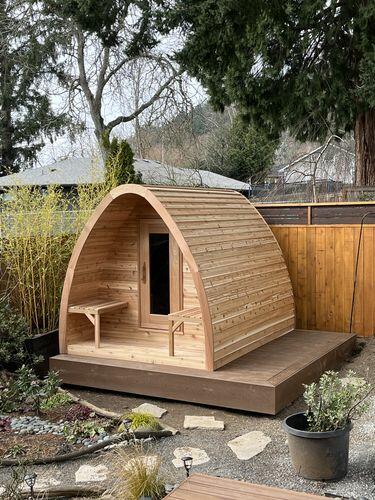
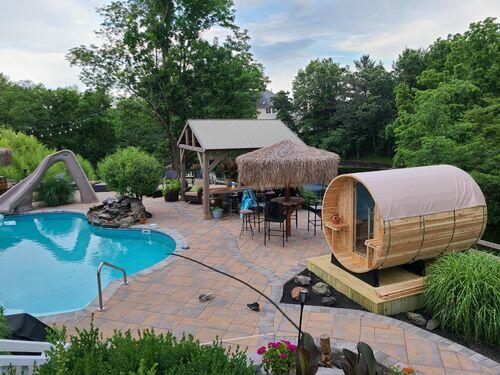
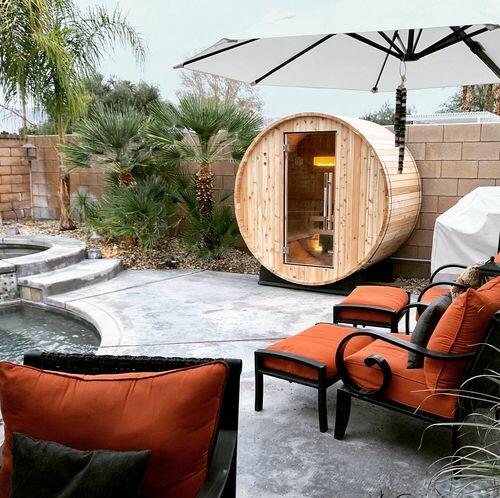
Outdoor Sauna Construction Considerations
Outdoor saunas require additional planning because they are exposed to weather.
The sauna structure should be built like a durable outdoor building, with proper attention to the roof, exterior siding, drainage, and weather protection.
Outdoor Sauna Basics
Plan for:
-
Weather-resistant exterior siding
-
Exterior housewrap or weather barrier
-
Sloped roof
-
Roofing material suitable for your climate
-
Snow load, where applicable
-
Rain runoff
-
Proper foundation or base
-
Drainage around the structure
-
Protected entry area
-
Exterior-rated electrical work
A front roof overhang is a smart addition. Ideally, it should extend far enough to shelter the sauna door swing and entry area.
Outdoor Sauna Roof Options
Common roofing materials include:
-
Asphalt shingles
-
Metal roofing
-
Cedar shakes
-
Other code-approved roofing materials
The roof should shed water effectively and be appropriate for the local climate.
Recommended DIY Sauna Build Sequence
Here is a practical construction sequence for a custom DIY sauna.
Step 1: Plan the Layout
Measure the room and sketch your layout. Decide where the heater, benches, door, windows, vents, and lights will go.
Step 2: Confirm Heater Requirements
Choose the heater early so you can plan clearances, electrical needs, control placement, and ventilation.
Step 3: Frame the Sauna
Use standard 2x4 framing. Add blocking for benches, heater, backrests, lights, and accessories.
Step 4: Rough In Electrical
Run wiring for the heater, controls, sensor, lights, speakers, and accessories before insulation goes in.
Step 5: Install Insulation
Fit mineral wool insulation snugly between studs and ceiling joists.
Step 6: Install Vapor Barrier
Staple aluminum foil vapor barrier over the walls and ceiling. Tape all seams with aluminum foil tape.
Step 7: Install Battens
Install battens over the vapor barrier to create a small air gap behind the cladding.
Step 8: Install Interior Cladding
Install ceiling boards first, then wall boards. Use stainless steel or exterior-grade fasteners.
Step 9: Install Door and Windows
Install the sauna door level, plumb, and square. Confirm outward swing and leave the proper bottom gap for airflow.
Step 10: Build Benches and Backrests
Install benches securely using sauna-safe wood. Hide fasteners wherever possible.
Step 11: Install Heater and Guardrail
Follow manufacturer's clearances exactly. Use a licensed electrician for electric heater connections.
Step 12: Add Lighting and Accessories
Install sauna-rated lighting, speakers, salt panels, thermometer, hygrometer, and other finishing details.
Step 13: Test and Inspect
Before regular use, test ventilation, heater operation, lighting, controls, door swing, and bench stability.
Common DIY Sauna Mistakes to Avoid
A custom sauna does not need to be complicated, but a few mistakes can lead to comfort, safety, or durability problems.
Avoid these common issues:
| Mistake | Why It Matters |
|---|---|
| Ceiling too high | Heat collects above the user instead of around the body |
| Benches too low | Sauna may feel cooler than expected |
| No vapor barrier | Moisture can enter wall cavities |
| Wrong insulation | Reduced efficiency or heat-related issues |
| Standard interior wood | Can warp, gap, splinter, or release resin |
| Exposed metal fasteners | Can get hot enough to burn skin |
| Poor ventilation | Stale air, uneven heat, and slow drying |
| Undersized heater | Slow heat-up and weak performance |
| Oversized heater | Short cycling and uneven comfort |
| No blocking in walls | Benches and accessories become harder to secure |
| Venting into wall cavities | Can create moisture and mold problems |
Good planning prevents most of these issues before they happen.
Sauna Maintenance Tips
A well-built sauna is relatively easy to maintain. The key is to let it dry properly and clean it gently.
After Each Use
-
Leave the door open after the session.
-
Open vents to help the sauna dry.
-
Wipe up standing water.
-
Remove wet towels.
-
Let benches air out.
Regular Cleaning
Use mild soap and water when needed. Avoid harsh chemicals, heavy detergents, or strong cleaners that can absorb into the wood or create odors when heated.
For benches:
-
Wipe surfaces regularly.
-
Lightly sand stubborn marks if needed.
-
Avoid sealing with non-sauna-rated finishes.
-
Keep surfaces dry between uses.
Seasonal Inspection
A few times per year, check:
-
Bench stability
-
Fasteners
-
Heater stones
-
Heater guardrail
-
Door operation
-
Vent covers
-
Lighting
-
Signs of moisture damage
-
Cracks, splinters, or sharp edges
-
Exterior weatherproofing for outdoor saunas
Small maintenance habits help preserve the sauna’s comfort and appearance over time.
Custom DIY Sauna Materials Checklist
Use this checklist as a starting point when planning your material order.
| Category | Materials |
|---|---|
| Framing | 2x4 lumber, blocking, treated bottom plate if needed |
| Insulation | Mineral wool / Rockwool insulation |
| Vapor control | Aluminum foil vapor barrier, aluminum foil tape |
| Interior wood | Tongue-and-groove sauna paneling |
| Bench materials | Clear sauna bench wood, backrest wood, trim |
| Fasteners | Stainless steel or exterior-grade nails/screws/staples |
| Door | Sauna-rated wood or glass door with tempered glass |
| Ventilation | Intake vent, exhaust vent, sliding vent cover |
| Heater | Electric or wood-burning sauna heater, stones, controls |
| Electrical | Heat-rated lighting, controls, wiring, sensor |
| Accessories | Guardrail, thermometer, hygrometer, bucket, ladle |
| Flooring | Duckboards, tile, concrete, or water-tolerant flooring |
| Outdoor build | Exterior siding, weather barrier, roofing, flashing |
Final Thoughts: Build the Sauna Around the Experience
A custom DIY sauna is more than a construction project. It is a space for slowing down, resetting, and building a routine that supports recovery and well-being.
The best saunas are simple, warm, and carefully planned. They use the right wood. They control moisture. They place benches where the heat feels best. They ventilate properly. They make every session feel easy to step into.
When you are planning your build, focus on the details that shape the daily experience:
-
A comfortable layout
-
A proper ceiling height
-
Smooth bench materials
-
Clean airflow
-
Soft lighting
-
The right heater
-
Materials designed for sauna conditions
The right materials make the difference between a sauna that looks finished and a sauna that feels right for years.
Explore our collection of custom DIY sauna materials to find sauna wood, vapor barrier, doors, heaters, lighting, bench materials, and accessories for your build.
SIGN UP. SAVE BIG.
Subscribe to be the first to know about our special monthly sauna sales, sent right to your inbox.


Let customers speak for us
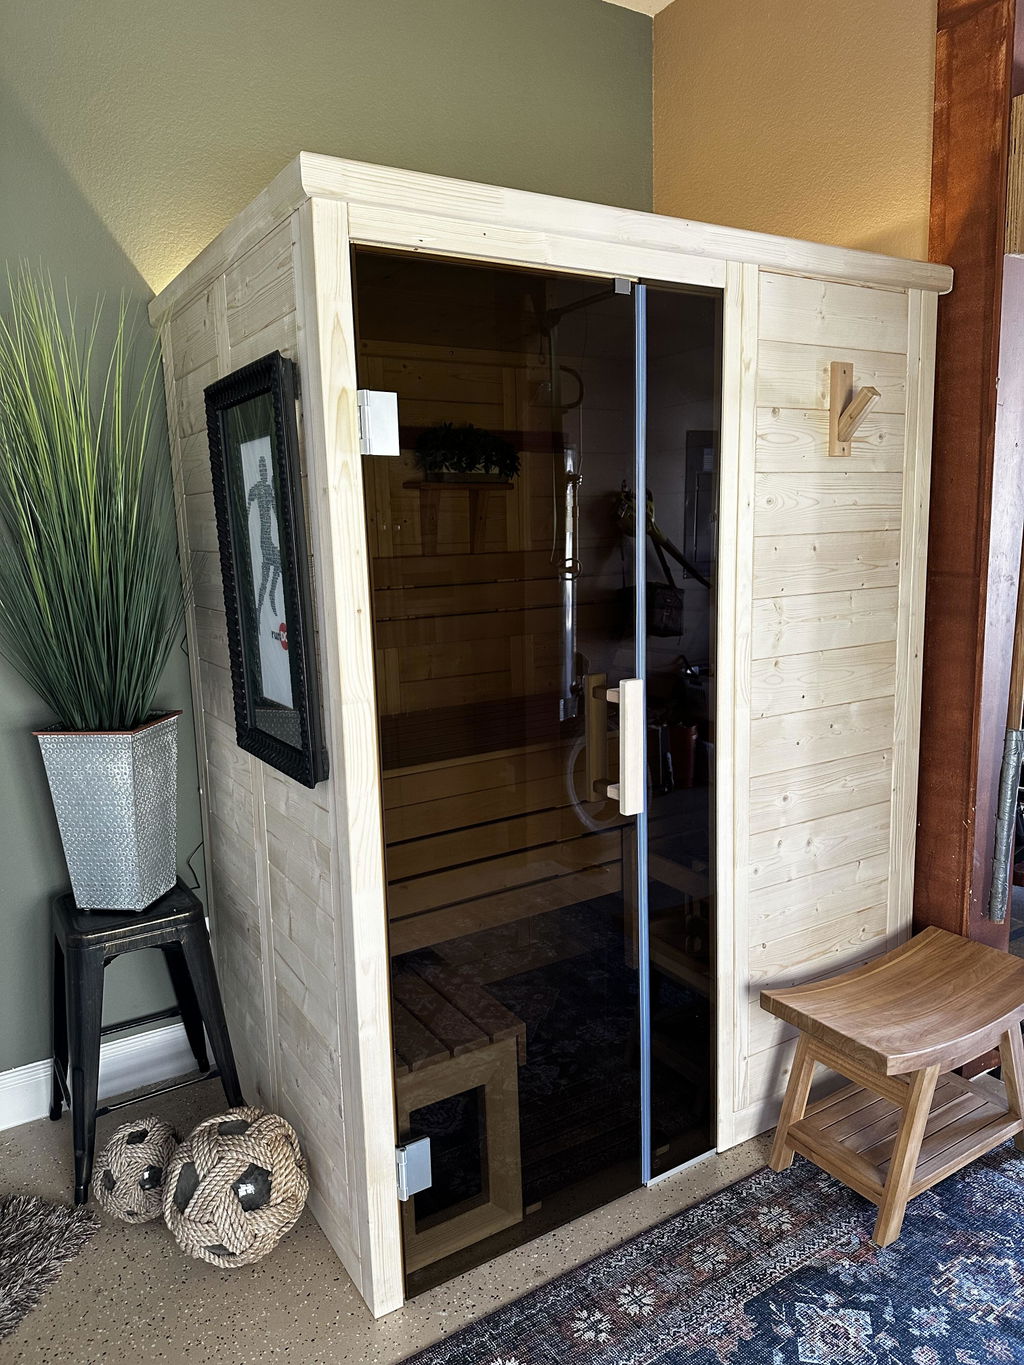
Good communication, easy delivery, easy set up, easy operation, great value. Recommended!

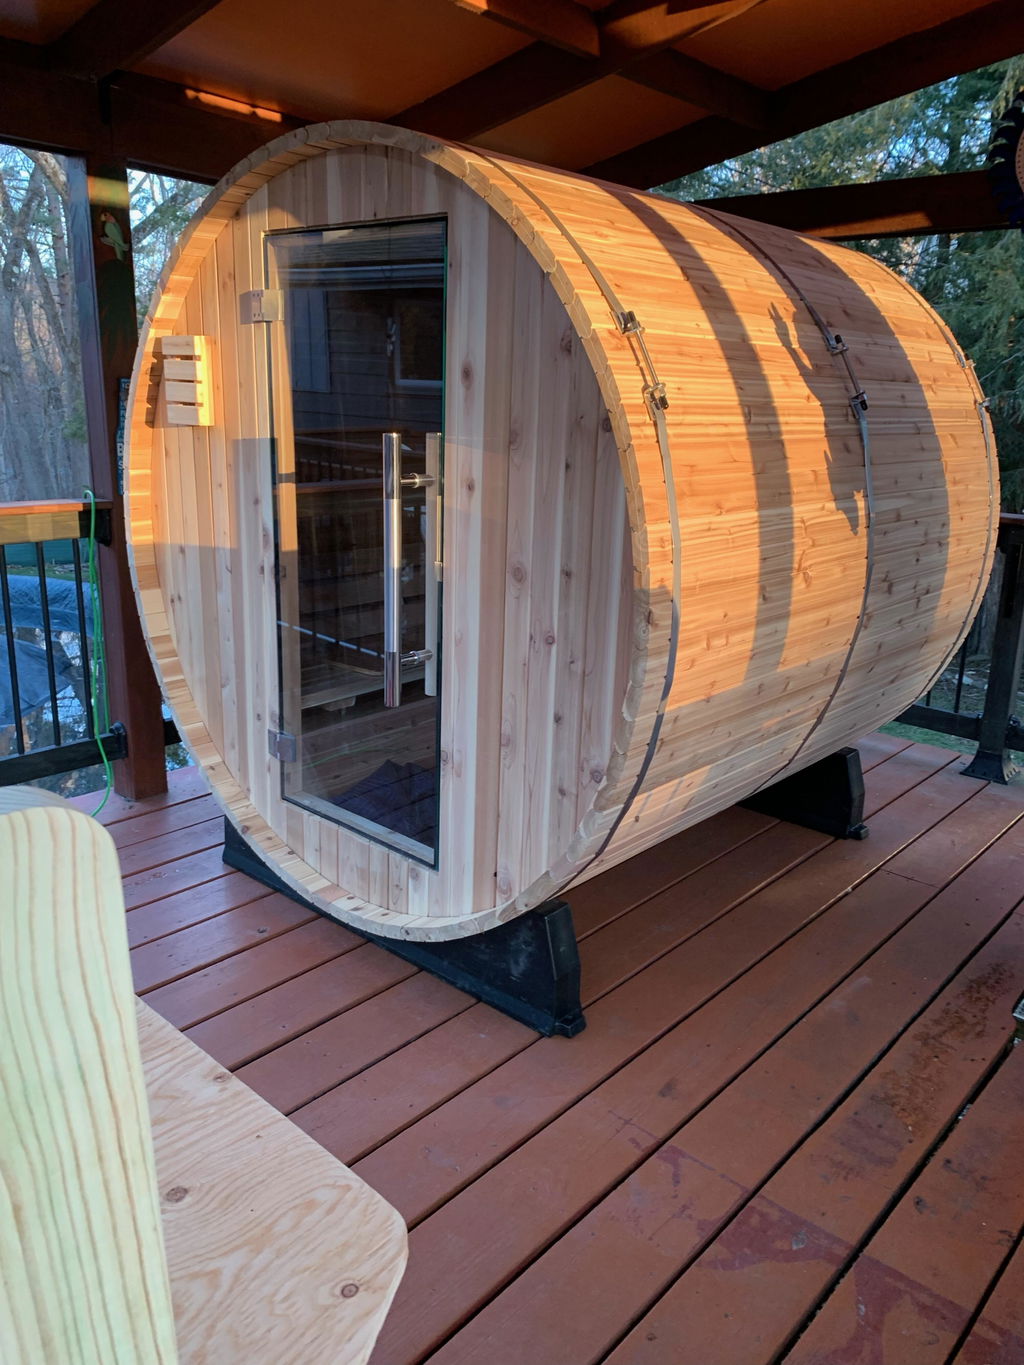
We ordered the 4 person barrel sauna and love it! We wanted a little extra space for the 2 of us/guests and it’s great. We could definitely fit 4 people in it if we needed. We use it every single day. It took about 10 weeks to get here because they build it specifically for the order. Putting the barrel together was fairly easy with 2 people. The electrical and the heater definitely required an electrician to install as we could have not done it alone.
We ordered the biggest heater (harvia spirit 8kw) and it heats up the sauna in about 15 mins inside our 40-50° garage. Overall this style of sauna is hotter and you sweat a lot faster than in an infrared sauna. I truly 10/10 recommend!
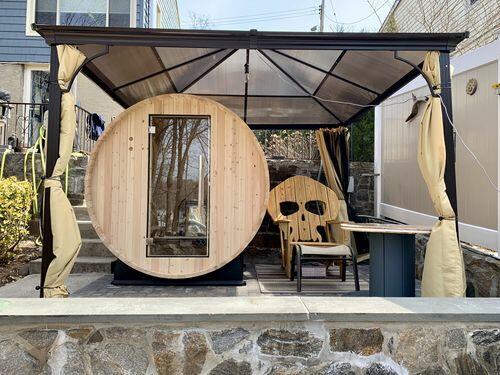
Pic is of us in the middle of building it.
Took me about 6 hours over 2 evenings to assemble almost all by myself. Had a pro run a new circuit from my panel. Very well made and assembly was straightforward. Heater is well sized and reaches operating temperature in under 30 minutes.
Great sauna very easy to assemble
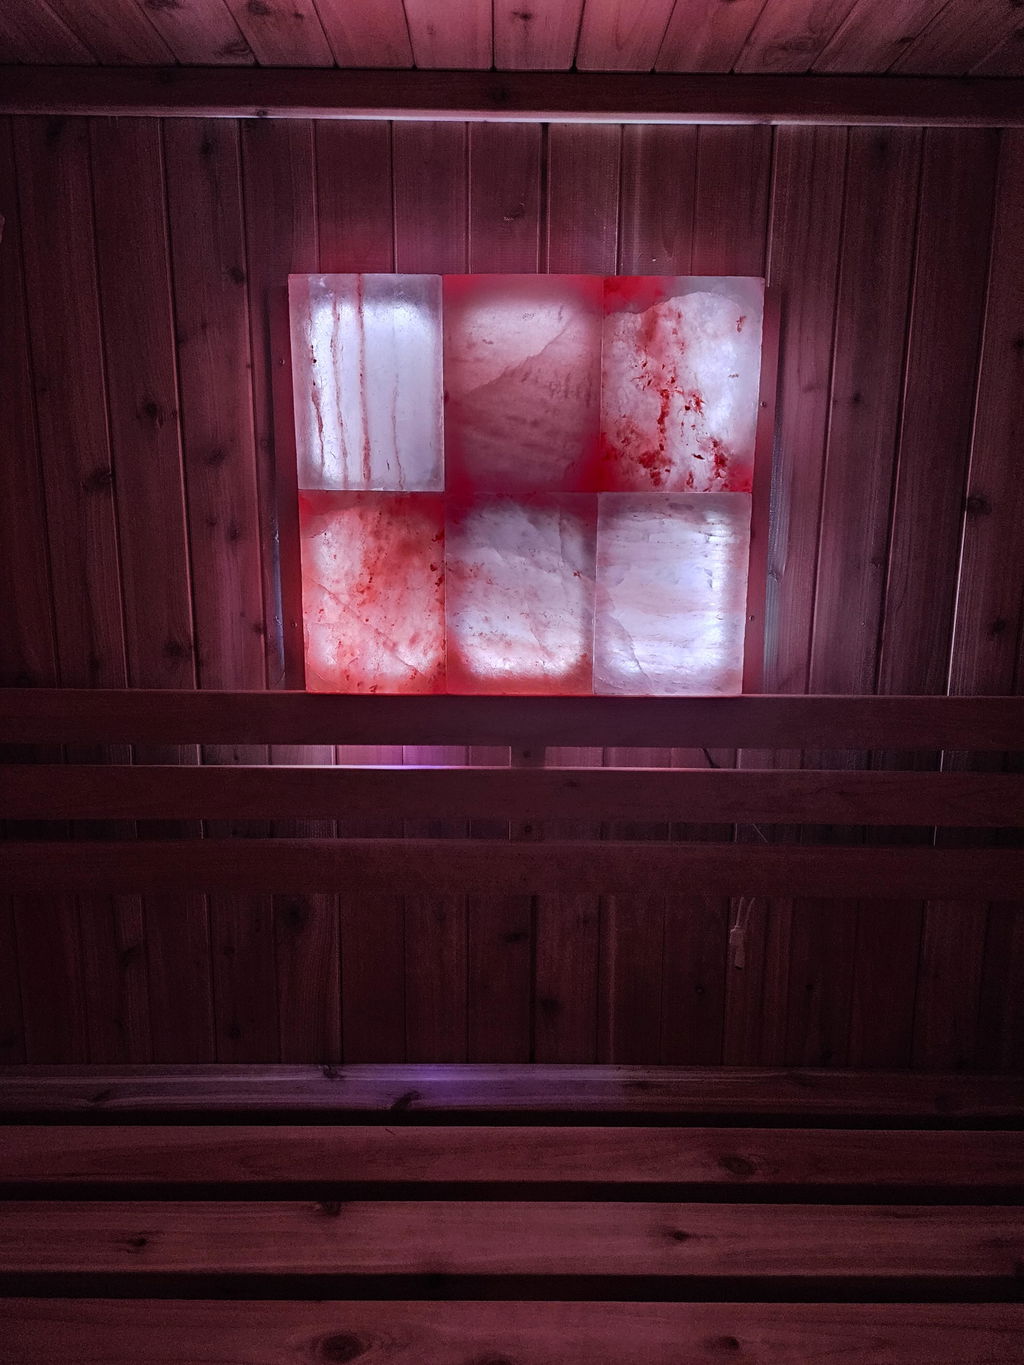
The salt panel was a great addition to our Madison Sauna. It has excellent grain which is accented by the amazing color lights that glow through the panel. Also when you hit the rocks with a splash of water you can feel the heat bounce off the panel. Great addition if you are considering this option.
We can say enough about Sauna World there customer support is great! Our Pinnacle Sauna from Almost Heaven is epic.
The finish and quality is outstanding and it was quick and easy to assemble.
We are thrilled with our mini pod!! It came well shipped and our friend assembled it in 11 hours! Wow! We cannot wait to get healthy and sauna it up!
Beautiful sauna!!! Much easier than I expected to assemble, took a total of 4 hours. Can't wait to get warm by the pool on those cool evenings. Customer service was excellent..
Purchased a 2 person Almost Heaven barrel sauna and were delighted with the product. The order process was quick and easy, the sauna arrived on-time, installation was simple, following the provided instructions, and the sauna is extremely high quality. We’ve used it daily for over 2 weeks and quite frankly I don’t know how we lived without it. If I had it to do over again I wouldn’t change a thing... except maybe purchasing a 4 person model to easier share with friends!
Great Customer Service and a breeze to put together.Excellent shipping and the Sauna is top notch, couldn’t be happier